Quilted Dolls Blanket
I wanted to make a present but now I have made it I love it so much I don't want to give it away! I made this dolls blanket using my newly acquired skill of trip around the world piecing.

Or maybe one block like mine is just called a trip I am not sure.
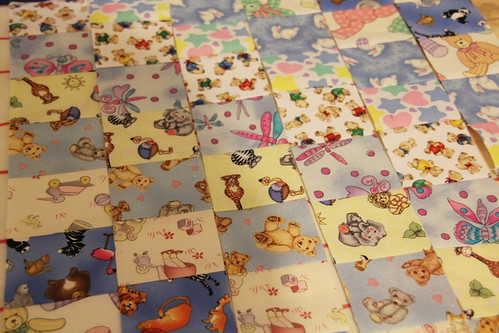
To make it I took 8 strips of fabric which were all 2.5" wide and just over 15" long. I sewed them all together to make a block of strips.
Then I cut a 2.5" wide sash which had a square of each different fabric in it. Then with the remaining block, I sewed the first and last strips together to make a tube. Then I cut the tube into another 5 loops each with 8 different squares of fabric. I put the first strip down and unpicked one seam of the first loop, at a different spot to where the first strip started, the next square down became the top square and so on until you have unpicked one seam on each.
Then it looks like this. Really easy and also looks great I think. Then you iron all the strips. You have to alternate ironing the seams one way and then the next so when you sew the strips together you can line up the seams by feeling that the ironed seams nest together. This is the secret to getting those corners perfectly lined up. That and also cutting accurately.
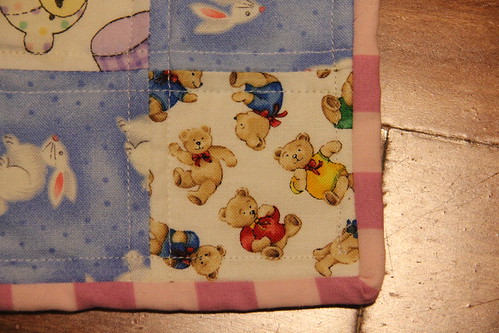
Once I had my top pieced I made a quilt sandwich with a layer of batting and a backing fabric and I quilted it by sewing in lines 1/4" away from each seam.
Then I made a stripy binding which I did not cut on the bias. You don't need it bias cut if you aren't doing any rounded corners. I decided to try my hand at machine finishing the binding. I always sew binding onto the front of the quilt with the machine but have always hand sewn it to the back before so I decided to try something different.
Here is what it looked like from the front. It is the extra row of stitching next to the binding. It was so fast - I did the whole thing in an evening.
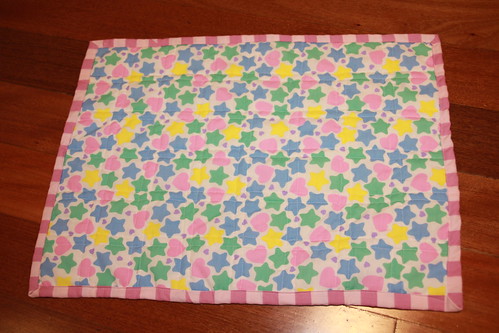
Here is the back. I wish I hadn't used this backing fabric. It looks cute but it must have quite a bit of polyester in it because it is not soft and just doesn't have the right feel.
After making this dolls blanket I realised my daughter does not have a dolls cradle so I am on the look out for one. So currently this little blanket is a dolls picnic rug.


thats gorgeous!! Love the blanket!!!
ReplyDeleteHow pretty and sweet! You'll have to make a pillow case to match when you find the cradle
ReplyDeleteLovely! You are so clever :)
ReplyDeleteLooks gorgeous! I have no idea how to sew so I love to see what other creative people can do. Thanks for sharing!
ReplyDelete#teamIBOT was here!
Oh what a precious quilt. I love the colors. Thanks for joining Inspire Me. Hugs, Marty
ReplyDeleteCute doll quilt! I love how quick doll quilts are.
ReplyDeleteVery cute. I have been playing with this technique too! It is sure a lot of fun!
ReplyDeleteEsther
esthersipatchandquilt AT yahoo DOT com
ipatchandquilt DOT wordpress DOT com
how adorable! i love that you made it eight strips so it would be longer than it is wide, that's great! and i love the cute fabrics you used. i usually end up giving away what i make, too, its so hard!
ReplyDeleteLooks adorable and maybe the backing will feel better after you wash it! Thanks for sharing.
ReplyDeleteFreemotion by the River Linky Party Tuesday
I really want to try the round the world strip piecing method. It looks like fun and your quilt it cute!
ReplyDeleteThanks so much for linking up with And Sew We Craft Together
Amy x
http://www.andsewwecraft.com/2013/04/and-sew-we-craft-together-linky-party-38/
So cute! I've never done a block like this but your explanation makes it sound super quick and easy. Now I'm going to have to add it to my list of blocks to try!
ReplyDeleteHi, Stopping by for a visit from the Let's Get Social Sunday Hop. I am a new follower. Love your quilts.
ReplyDeleteDarlene