Friday 5 December 2014

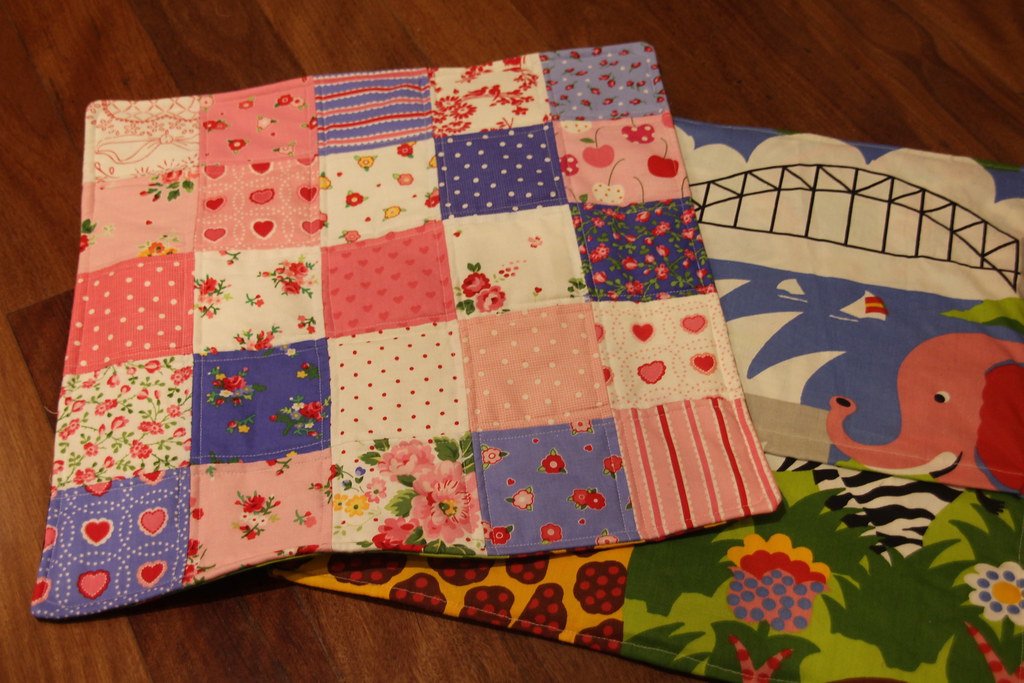
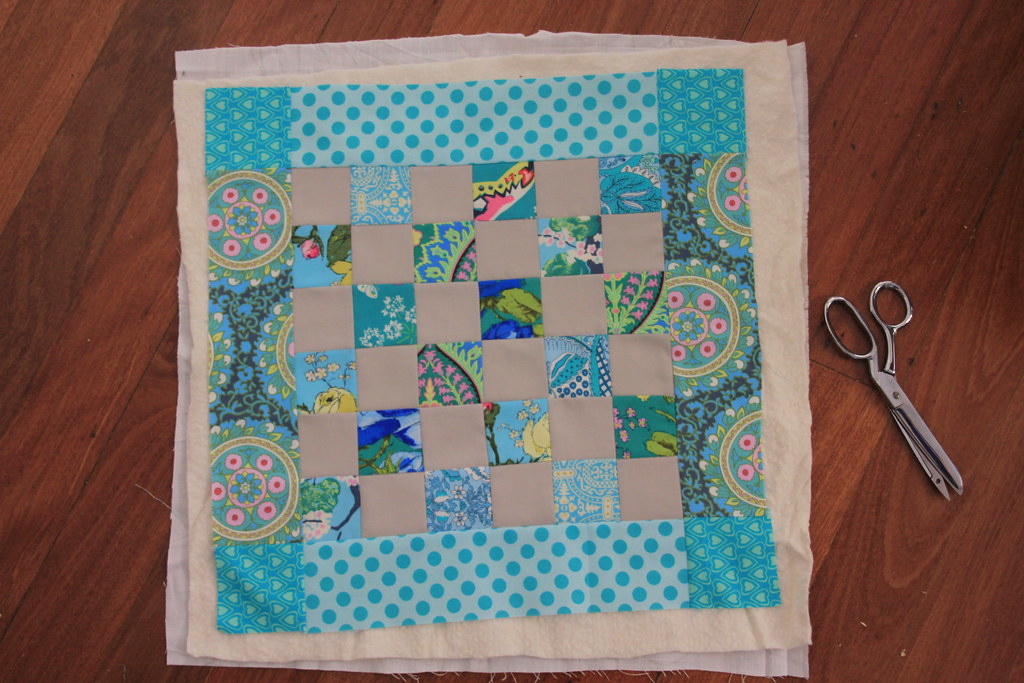
Making cushion covers for Little People

Some lovely friends left Sydney and loved back to the UK earlier this year.  They had two little girls so I decided to make them something to remember us by.  I felt that if I made cushion covers not only were they small enough to fit in the suitcase, but they would be used a loved for many years.  I hope I am right!

I used up some of the last of my Children at Play by Sarah Jane for the first one.
I quilted it with simple lines 0.25" from the seams.
The other side was taronga zoo fabric with an envelope opening.
I appliqued an E onto one square.  The squares were about 3.5" raw.
The other cushion for the sister used pam kitty love fabric.  I decided to make the squares smaller.  They were 3" raw.
I just love the pam kitty fabrics.  They are so my thing!
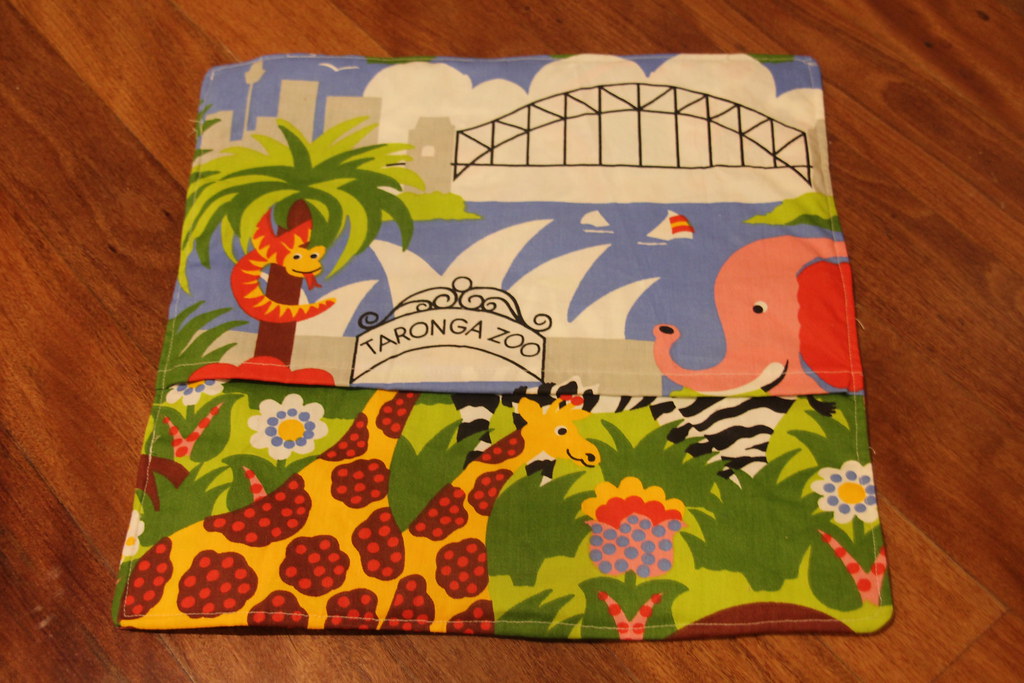
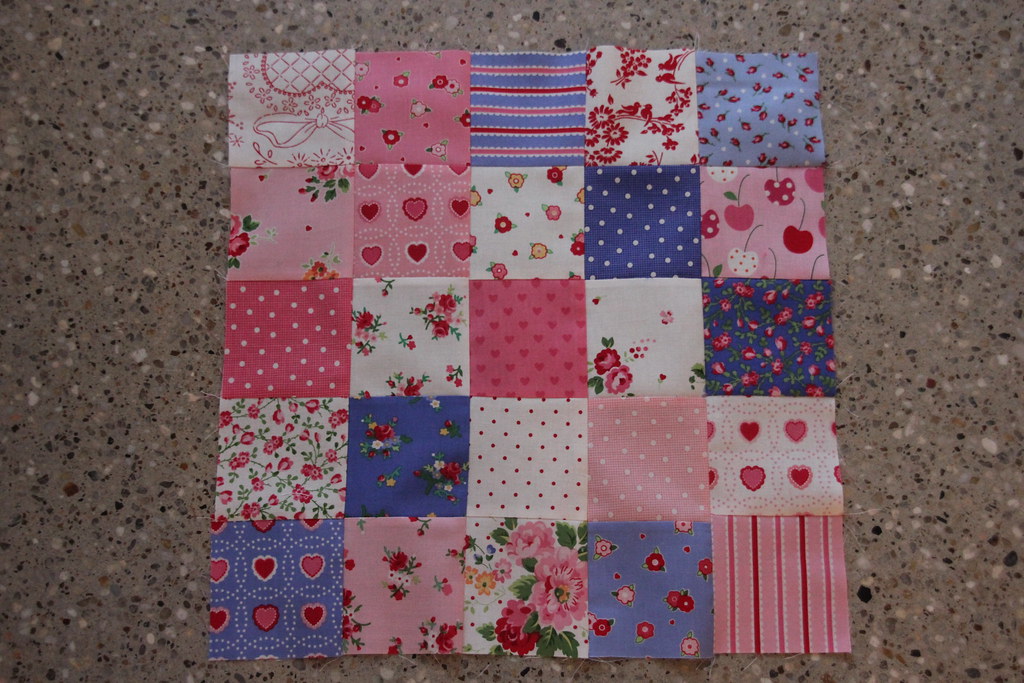
So here are the new cushion covers.  I wish I had taken pictures with them filled with cushions!
But now they are in England and maybe I will get pictures one day!

Friday 14 November 2014

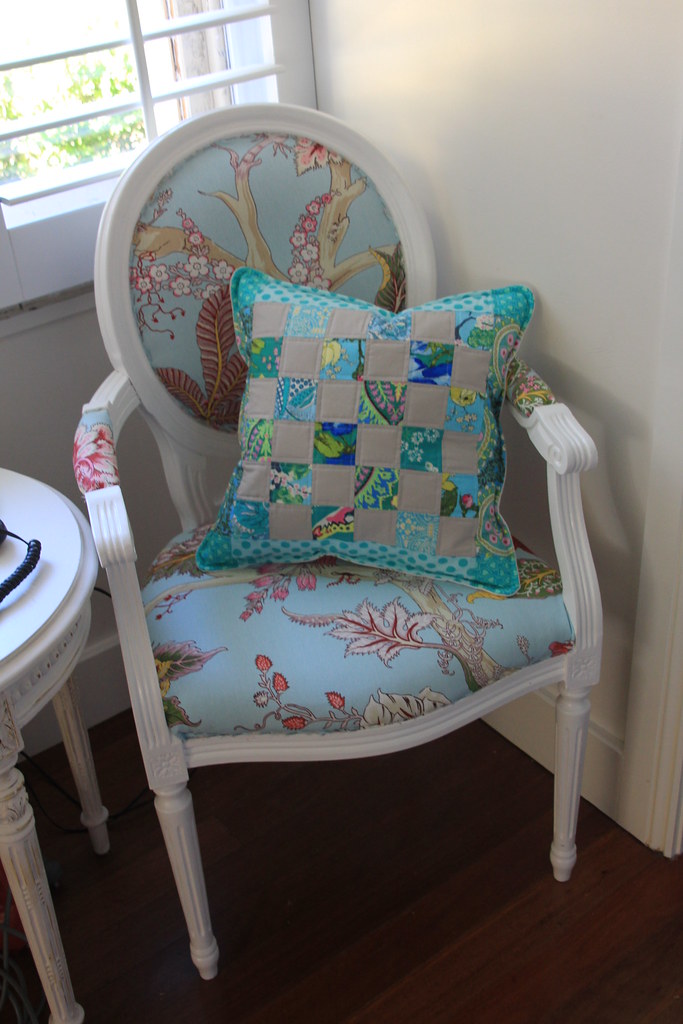
Present for a Special Person

There is a special teacher at my sons school who has been helping him in the last few months and I wanted to make her a present.  I thought about buying flowers but just wanted to do something more personal.  So I decided to make her a cushion cover.
This is it finished.  It is Amy Butler fabric mostly.  The solid is kona ash.  The dots are ta dot sea.  I love those dots!
Here it is pieced.  I used an amy butler charm pack and so the squares were 2.5" when cut and the finished squares are 2" finished.  The side strips were cut 3" wide.
I quilted it with simple lines 0.25" from the seams.  I always use a lining for my cushions. Here I used a white fabric that is quite thick and I ended up using that for the back too.
Here is the back.  I used a zip.
I finished the edges by sewing the back to front right sides together and then I cut off the excess batting etc and turned it the right way.  I then do a line of stitching about 0.25" from the edge.  I like this way and it is easy.
This gift was hand delivered today by my son and I think the recipient was happy.
The chair is not finished but that is another post.


Friday 7 November 2014

How to make a Kids Teepee

Long time no see!  How are you?  My christmas break sort of turned into a sabbatical.
I want to get back into blogging regularly and see if my readers are still out there!
I have been making stuff and repurposing stuff so I do have some material to tell you about.

I have been trying to make a teepee that is easy to put up and doesn't just sag for a very long time.
I looked up in blogland and there were no specifics really about how to get one that can be put up fast by one person.  I found at first the teepee just slid down the sticks and was a pain.  So I have an answer to how to fix that.

I have looked back at my photos and found that I started the teepee last October - not as long ago as I thought!
The first thing I did was buy 6 x 14mm wooden poles which were about 2.4m long.  I think 5 poles might have been easier but I wanted the teepee to be nice and big - not convinced now that that made any difference.  Then I cut out 6 triangles from a pair of curtains and thought about how to keep the poles in position.  I used tabs at first like on curtains.  I quickly decided this would lead to a saggy teepee so made tubes the length of the teepee for the poles to slide into.  Here are the tabs.
See?  Saggy.
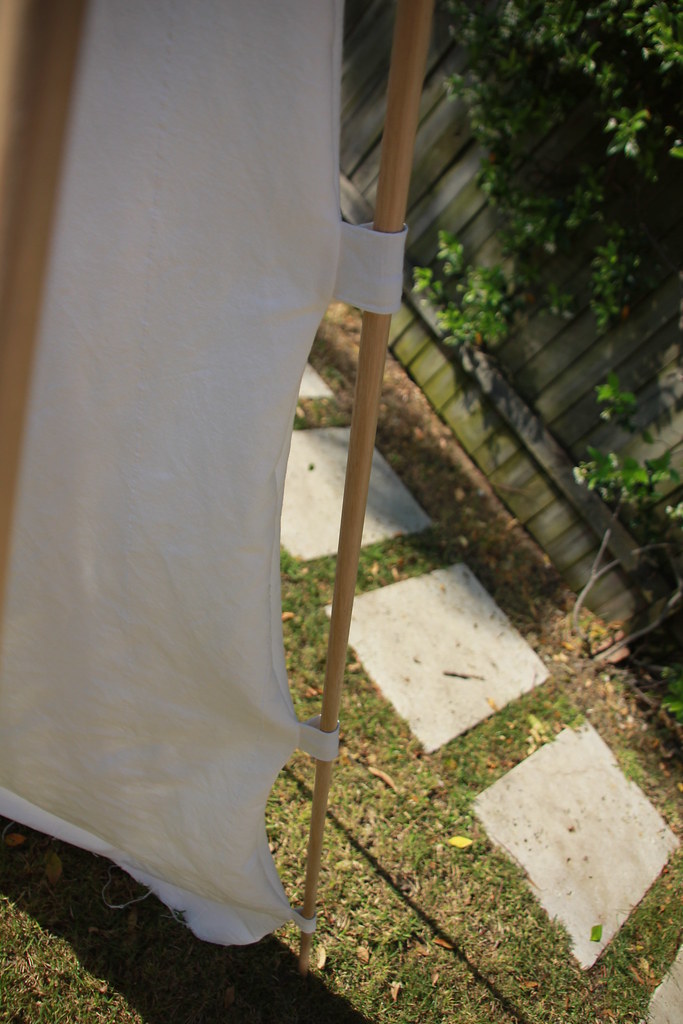
Don't do it like this.
So, once I had taken it apart and made tubes for the poles it looked like this
I am not going to give dimensions.  It will depend on how long your poles are, how many you want (4, 5 or 6 basically) and how much fabric you have.
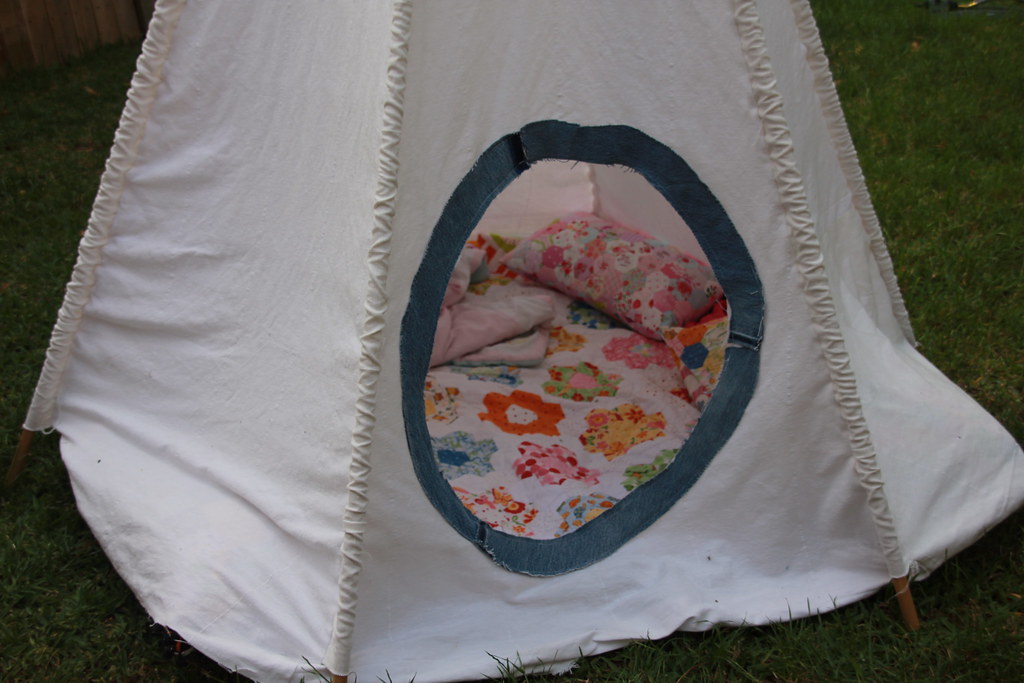
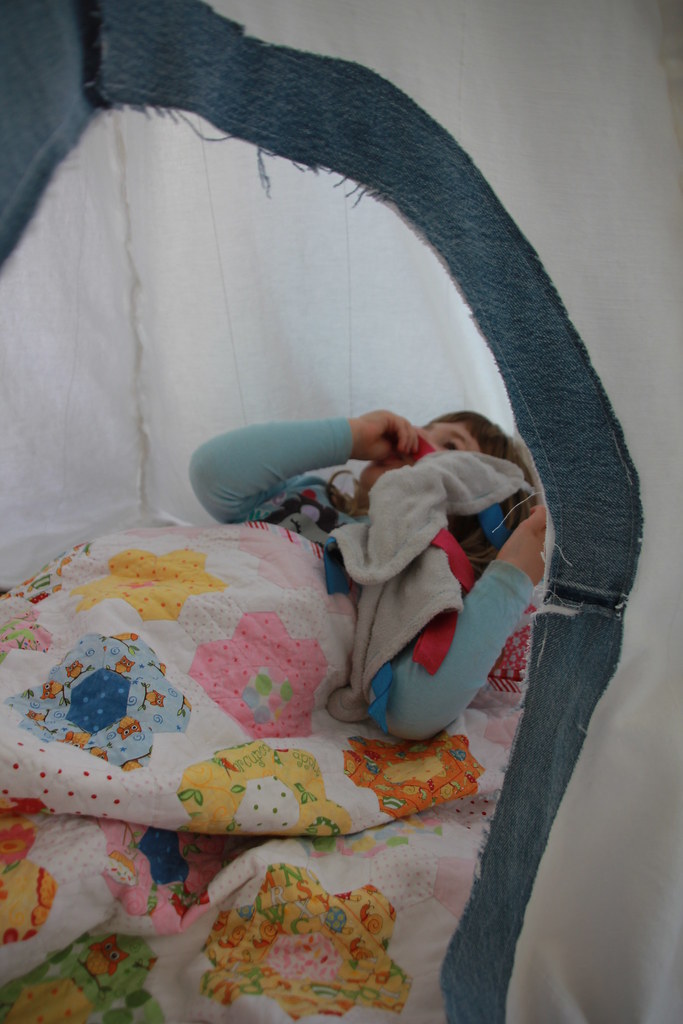
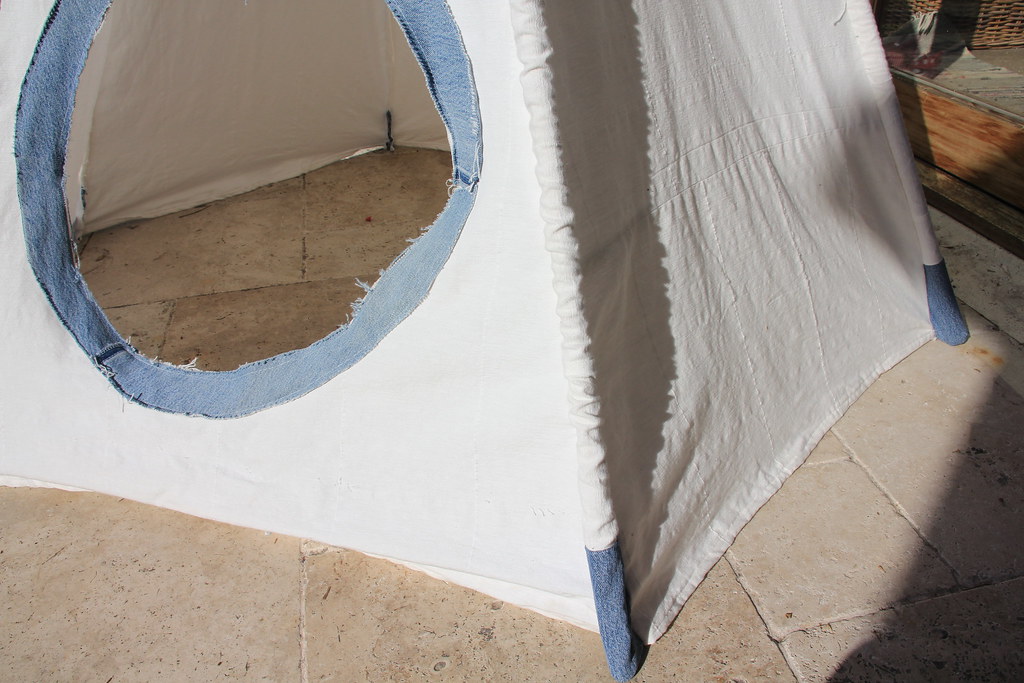
I went for having a hole for a door.
Then I did a denim applique surround for the door.
Once I had got the teepee to this point it basically worked.  I wanted to put denim around the bottom and top to finish off the edges and work out how to make it so it didn't slip down the poles and would go up more easily.  It just took me ages to put it up each time and keep adjusting it until all the sides were straight and taut.  The children played with it like this and enjoyed it for a long time.  I couldn't work out how to finish it professionally.  I don't expect they cared.
It occurred to me that they would be too old for it by the time I finished it.  Have you had that feeling?

Then a friend found a broken one beside the road (which mostly worked) so I was able to have a good look at it.  I had looked at some in shops before but they relied on having rods of wood around the bottom... and I couldn't work out how to do these and be able to still wash it occasionally.  Plus I didn't like the idea anyway as cjildren would sit on them and roll on them and it would hurt.
The one she found had the the poles in tubes but they weren't open at the bottom, so I closed up mine.  I then worked out where I needed holes in the poles to tie string through (I had already had these but as the poles could move through it was always took ages to get it set up).  I also cut the poles shorter as at 2.4m they were too long.  Then I used other holes further down the poles to anchor the pole to a spot in the tube.  This kept the teepee from falling down the poles.
the denim feet.


There are holes near the top of the poles for the string but also holes further down in the tubes.  I threaded some yarn through these and tied them which keeps the teepee from sliding down the poles and wrinkling up.


Tada!  With bunting obviously.
Totes amazeballs right?
I know it looks wonky but it is just the angle - honestly (or photographer).

So, to recap:


  • I found that I needed to sew up the ends of the tubes so the poles stop at the bottom of the teepee.
  • Sew or tie the poles into the tubes using the hole in the pole near the top so that the the teepee doesn't slide down and wrinkle up.
  • Make holes for string at the point near the top of the poles when you have worked out how high it needs to be to make the sides taut.

This should give you a nice looking teepee which is easy to put up and down!
Good luck!

Tuesday 29 July 2014
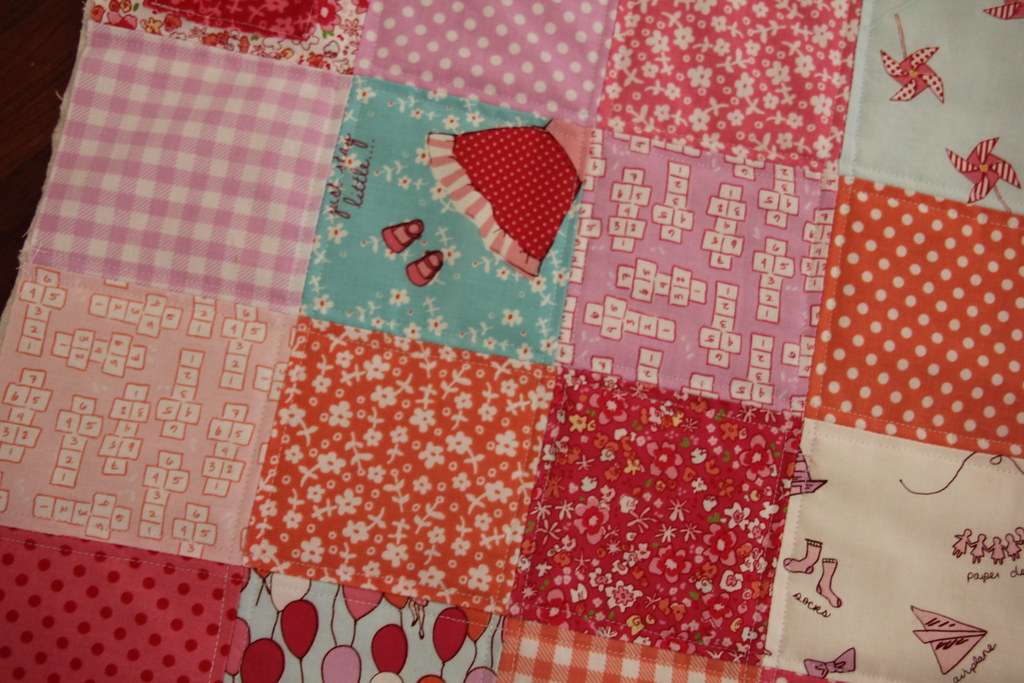
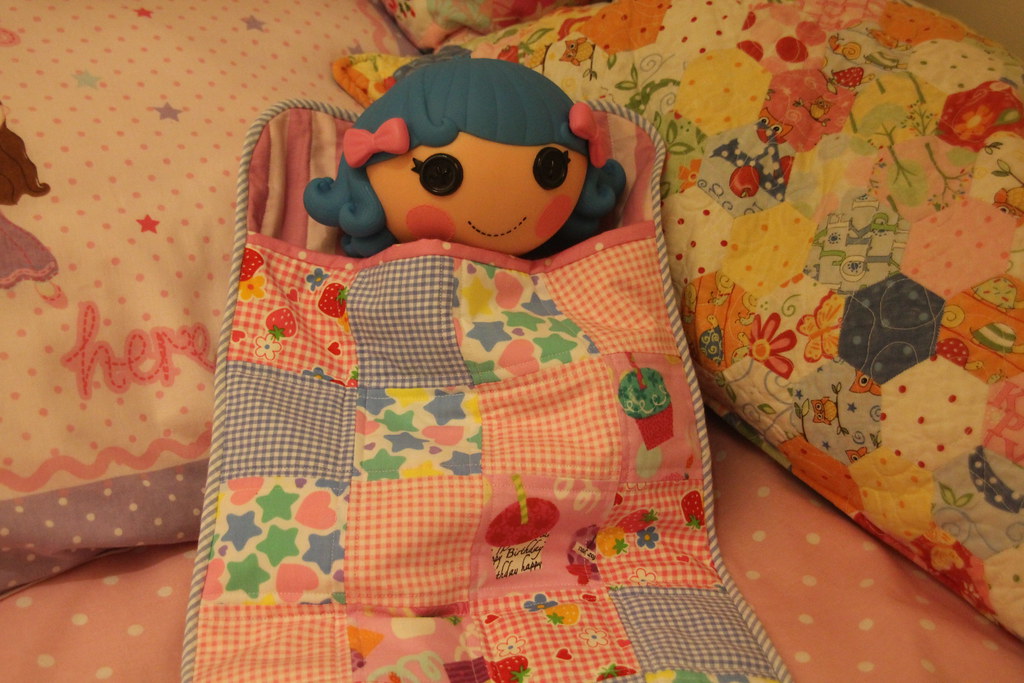
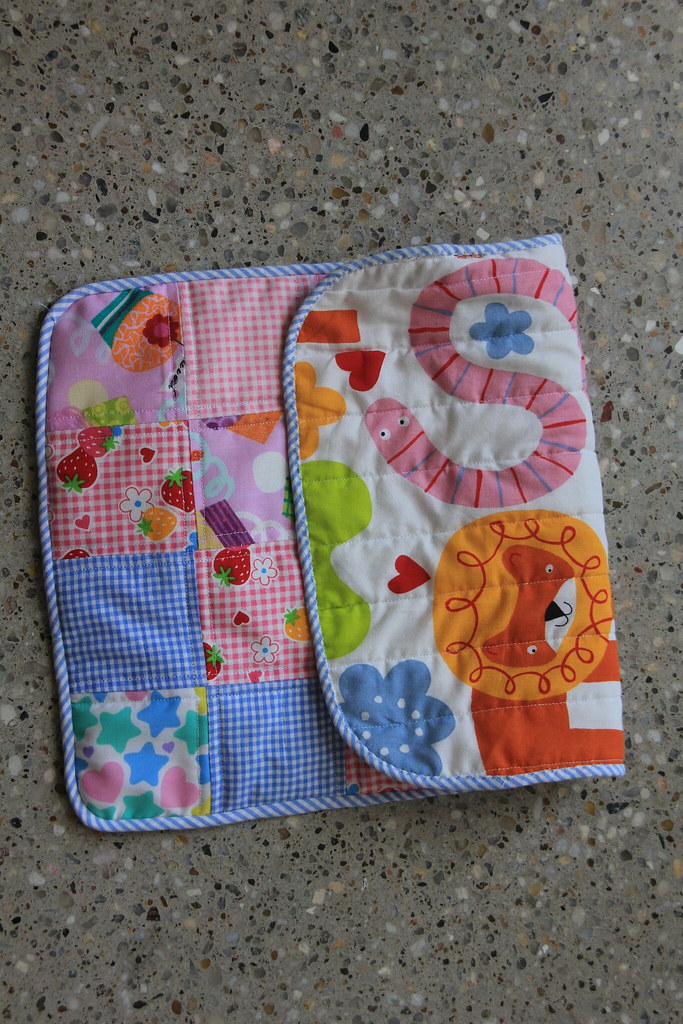
Dolls Sleeping Bag

I made a little gift for a friends daughter.  I had promised her a dolls blanket (this one) but when I had made it I decided to keep it for my child.  So naughty, I know!
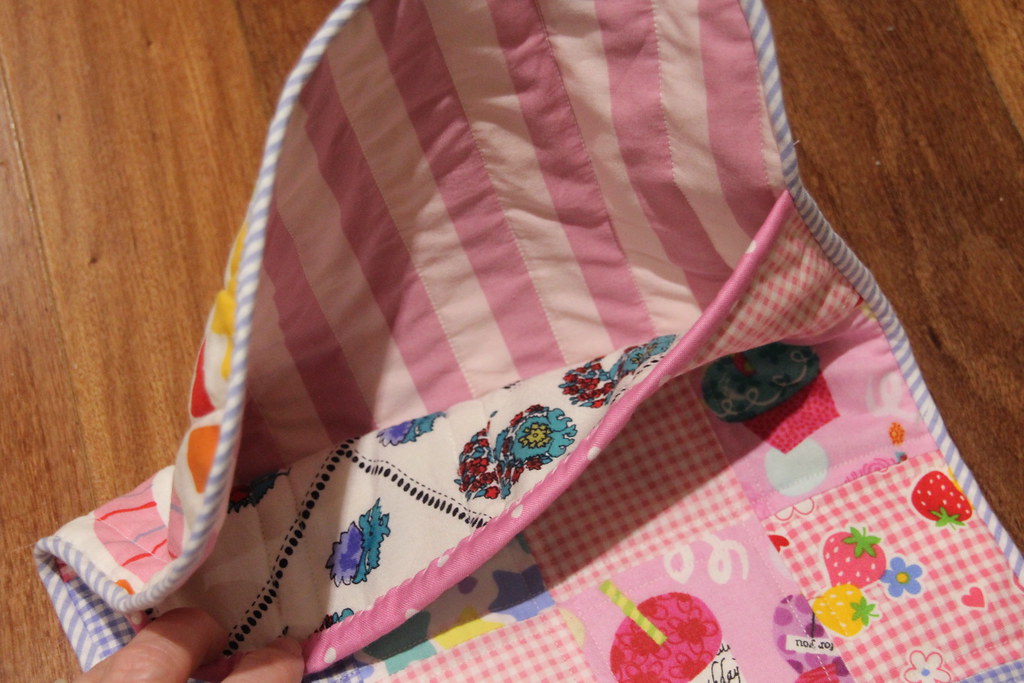
So I finally got around to making another one and I decided to make it a sleeping bag and not just a blanket.
This is the front sewn to the back with the binding stitched on but not finished off.
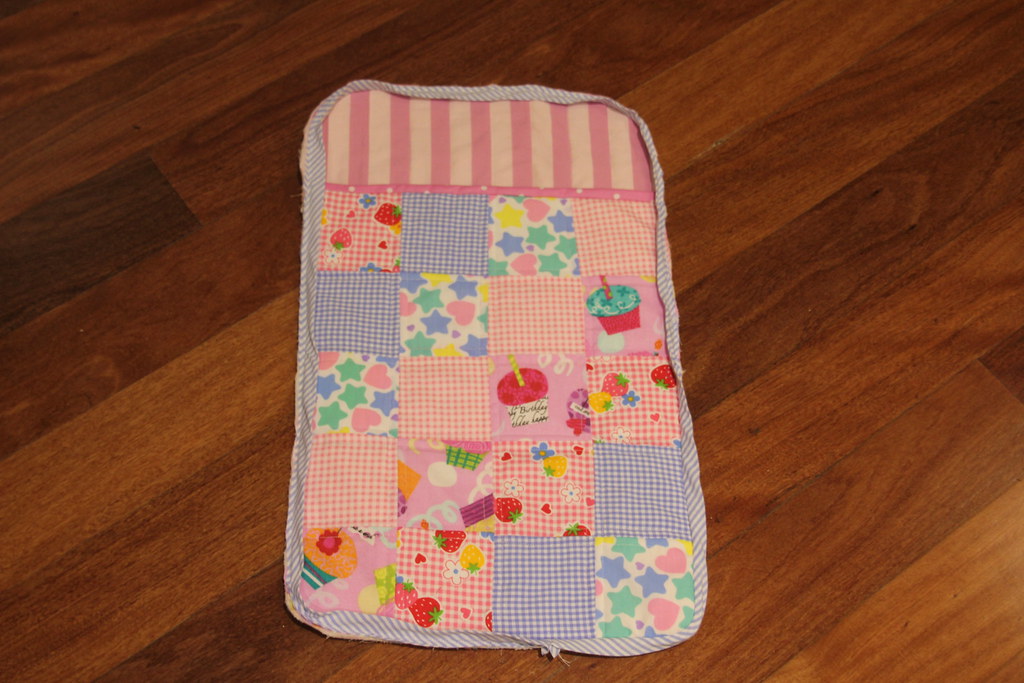
I had to do bias binding because of the rounded corners.  I love rounded corners.
The inside was so soft.  I used two fabrics, origin unknown, and they were both soft which is what you want for your dolls sleeping bag.
The squares I used were 3" square when finished and I cut them into 3.5" strips and used this method here.
And here it is all finished and being enjoyed by lalaloopsy.
She is very cosy.  The sleeping bag also doubles as a bag which was just lucky.  At some point I think a nice long strap for over the shoulder could be added and a button and loop fastener.
The back fabric with the lion and worm is from ikea.  All the others are unknown fabrics - we all have them!  And the recipient was happy!

Saturday 21 June 2014

Baby Ball from Pentagons

I made something!
Well it has been a few weeks between posts.  I have actually made quite a lot of stuff so thought it was about time I posted about some of it.
I made a baby ball for a friends baby recently and I put ribbons on it too for added interest.
They can use the ribbons to hang t to something and babies love ribbons anyway.
I used all children at play fabrics as I have a lot of scraps of this I want to use up.  The ribbons are just various ones I had lying around.  It is all hand sewn.  I hope it will be robust enough!
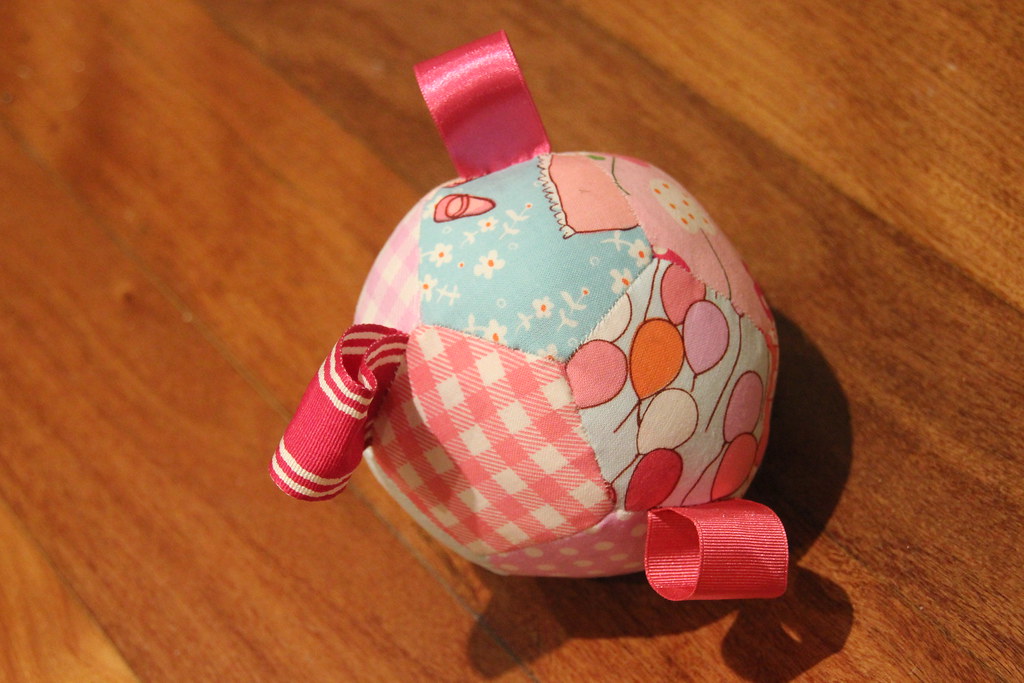
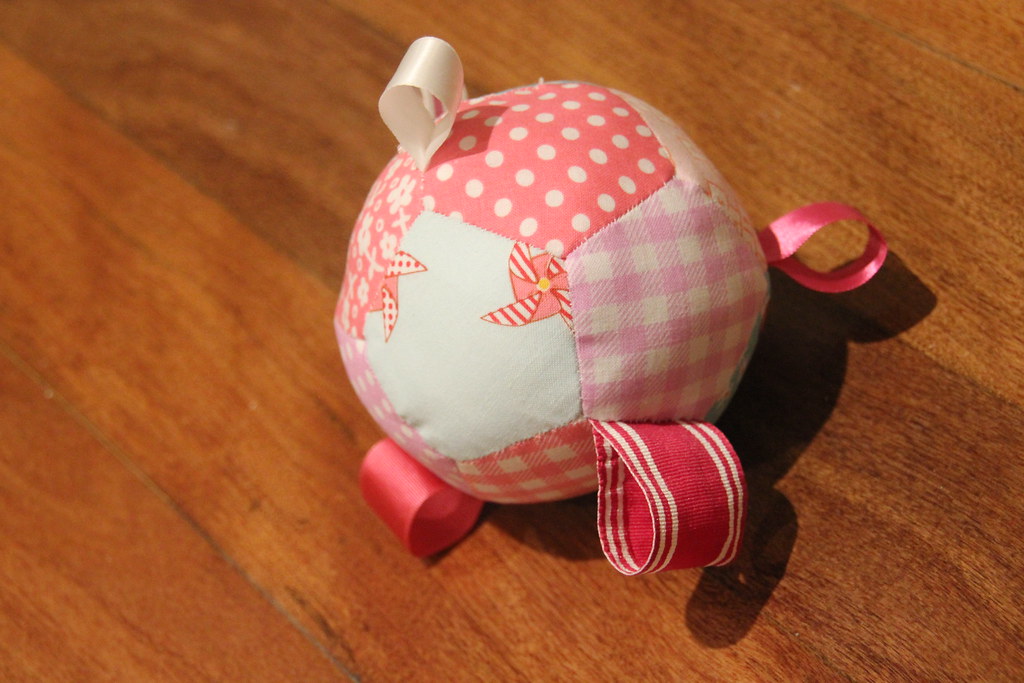
I always wanted to make a pentagon ball and this is my first one.
I might even start blogging a bit more again.  Just for no reason at all.

Saturday 15 March 2014

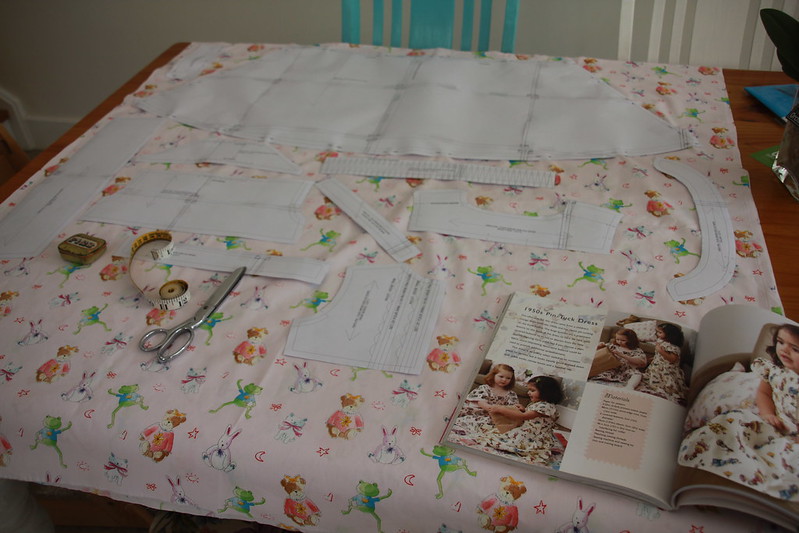
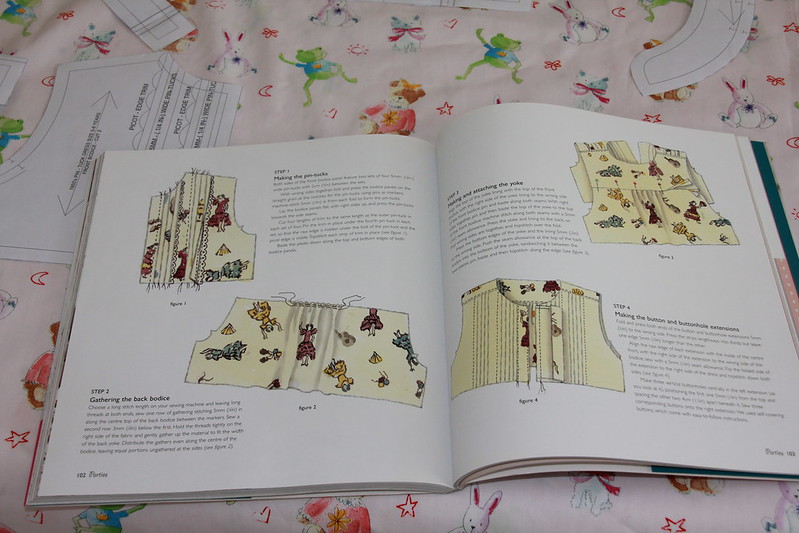
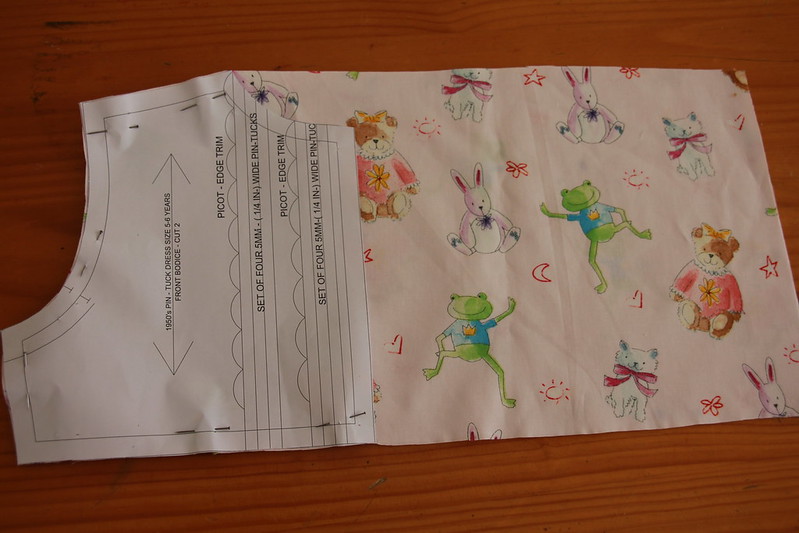
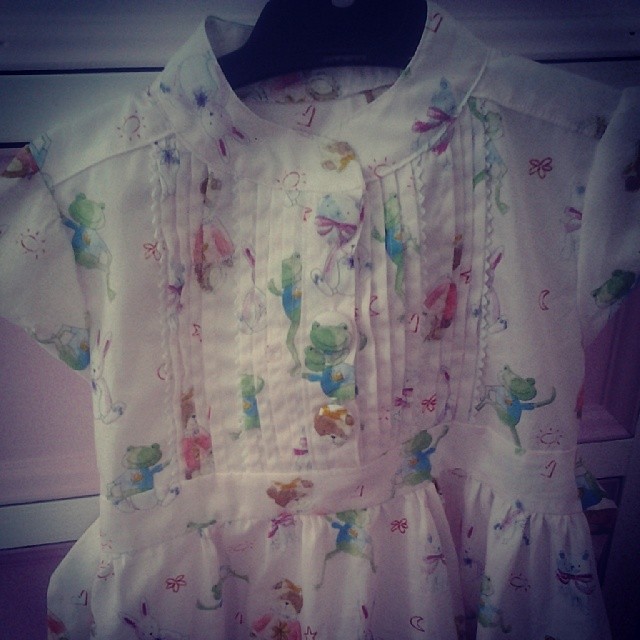
Vintage Style for Kids, 1950s Pin and Tuck Dress

I must have had this book, Vintage Style for kids by Fiona Bell for well over 3 years.  I have had the fabric and everything to make my first project from the book for at least a year.  I even had the pattern printed out and cut out.  I am pretty sure I had a burst of enthusiasm about a year ago when I watched Great British Sewing Bee.  When the new series came around and I realised that I had made one garment in the entire time, enough was enough.  Less than 2 weeks ago I bought fabric to make a top for myself and decided I don't want to use any patterns I have, so I was going to go and buy one.  I knew I had to make the dress before I could purchase any more patterns or fabric for clothes!
First thing to do - print out a new pattern and stick it together and cut it out in the next size up as my child has already outgrown the old one!
The book has a cd in the back of it which has pdf files of all the patterns.  They don't fit together very well at all once you have printed them.  There is no layout showing you how to lay out the pattern onto different widths of fabric.  The book tells you how much fabric to buy but it is vastly too much which is a real waste of money.  It also only gives you one amount to buy for each item, so you buy the same amount to make a garment for a 7 to 8 year old as for a 24 month old!  It is obvious that in publishing the book no one made up the designs and actually printed out the patterns stuck them together and worked out how much fabric or layouts. 
I have the size 3-4 and the size 5-6 cut out and I am a little concerned that the front bodice pieces are exactly the same size and the skirt appears to be the same waste size for both, but just longer for the size 7-8.  There is a separate pdf for each size on the cd instead of having them all printed on one showing how they get bigger like on normal patterns.  As they never cut these out this worries me. 
The first piece I have to work on is the front bodice which contains the pin tucks.  The pattern piece is the size it needs to be after you have made 8 pin tucks in it.  I can see that it would be helpful to have a pattern piece of the size the front bodice needs to be with the pin tucks so it is the right size, but I also need to cut it from fabric so I think I need what the pattern piece I cut needs to be like more.  Luckily I read the book reviews for this book on amazon (after buying the book) before I cut out any of the patterns in fabric.  I can see why people might be upset about that.  So I just made my pieces much much longer so I can put the tucks in and still have it the right size.
In the photos of the finished dress in the book and the illustrations of how the dress goes together the pin tucks are shown going are towards the shoulder and are in the yoke seam.  However, the pattern shows them only up to where the yoke joins.  This is another indication they never made the garment using the supplied pattern.
Other things wrong with the pattern included that the sash was far too wide and after I had made and attached it I had to remove it and make it thinner.  Also, the size 5-6 dress is very small.  It only just goes on my 4 and a quarter year old!  Looks like she'll will be wearing it every other day until she grows out of it!
I will post pics of it on!

Thursday 6 February 2014
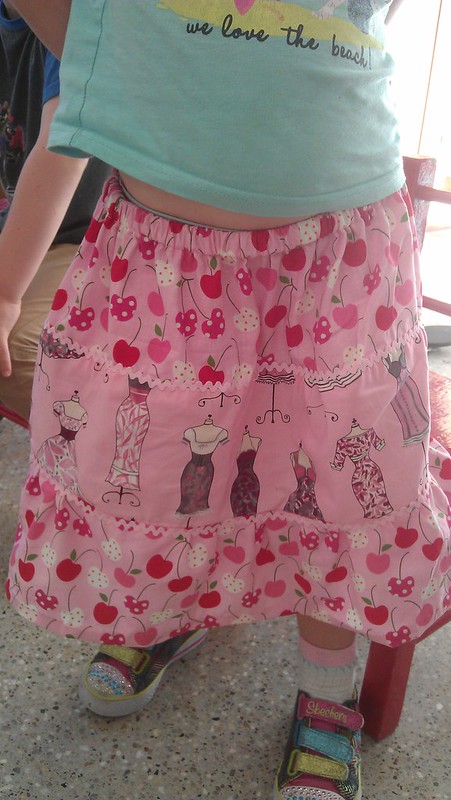
Simple Girls Skirt

Hello, I have been away a while. A Christmas break morphed into the whole of January and now my oldest child has been back at school over a week and I am finally blogging. You can get out of the habit. Anyway, I made a little dirndl or gypsy skirt.  I did loads of other stuff obviously.
It is 3 tiers and next time I may go 4 or 5 tiers.
The strips for a skirt for age 4 to 5yrs are:

1) 97x18cm
2) 117x15cm
3) 137x16cm.

Join strips if you need to to get the lengths.
A 1cm seam allowance is used.
Sew the strips into wide tubes by sewing along the short sides.
In the top strip make a channel for the elastic by turning over 1cm and then another 2cm and sewing along the edge.
Gather the second tube along the top edge by hand sewing around it and pulling the thread to the desired size.  Pin to top piece and make sure gathers are even and then baste and machine stitch into place.
Repeat that step with the bottom tier and then hem the bottom tier.  I hem by hand but do it however you want.
Use 2cm elastic and thread it through and make the waist band the required size.
I used rick rack around the seams but any ribbon you had would work.   You can use two or three different fabrics.  I wanted to use 3 but did not have 3 that looked good together.
Stand back and admire your work

My little girl loved it and has worn it everyday since I made it, except the day I washed it.  That is 5 days.  Also, she wore it in bed the first night!

Yes those are skechers runners.  She loves them too as they are sparkly.

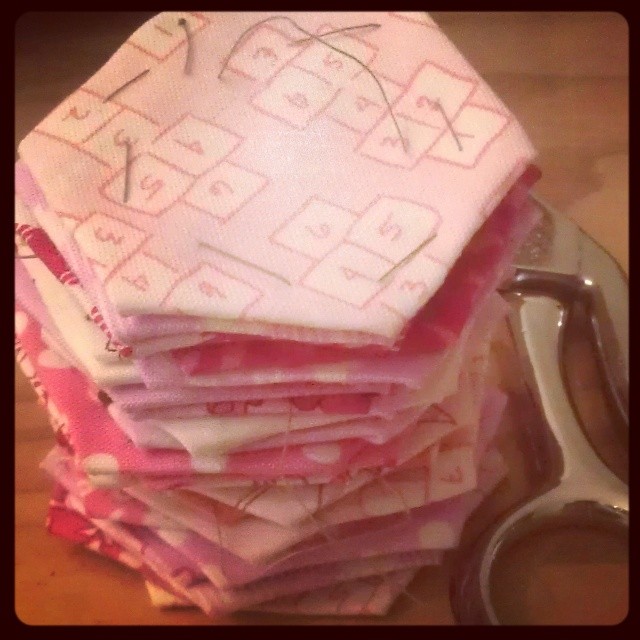
I also made a few hexagons
Old habits die hard.

And I got some fabrics.
I absolutely love these and want to make something modern!

Happy New Year! In two days time it is a year since I started blogging.  Happy Birthday to Sew Paint it!