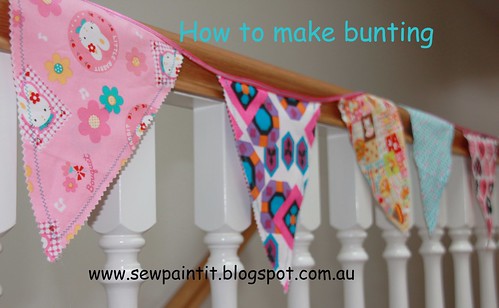
How to make Bunting
I love bunting. I see it for sale at craft markets and other places and it is very expensive for just a few little flags. It is so easy to make. All you need is a sewing machine, long length of bias binding and some fabric in whatever colours you want to use. Pinking shears are also a good idea or a pinking blade for a rotary cutter.
It is good for using up pieces of fabric you have left over.
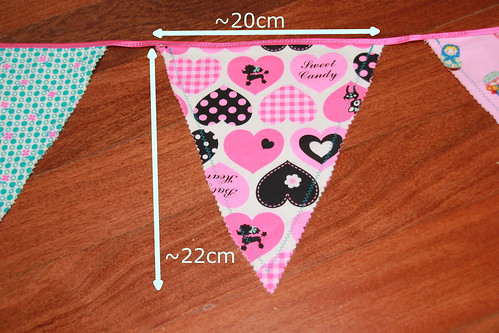
Simply cut out two triangles of each fabric you want to use for each flag making them roughly 22cm long and 20cm wide.
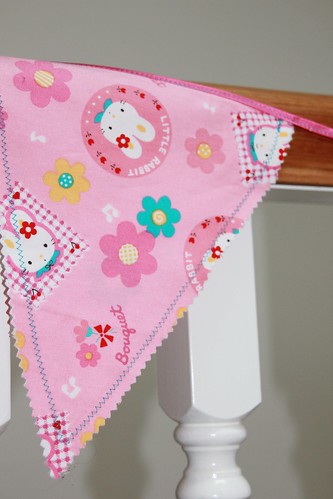
Place them wrong sides together and sew them together along the long sides using a zigzag stitch. I used a bright blue thread as a contrast. Once they are sewn together you can cut around them with pinking shears so they are exactly the same size and the wrong side of the fabric cannot be seen. No need to join the other, shorter side as you will do this when you join them together.
Make up as many flags as you want. Once you have enough take your bias binding and fold the open top edge of a flag into it doubling the bias binding over and hiding any raw edges of the flag. Leave a trailing edge of bias binding before the first flag and start sewing the bias binding together on this trailing edge a few inches from the first flag. You can later make a loop here which helps to hang the bunting up. Sew along this folded bias binding catching all the top edge of the flag. The zigzag stitch not only looks nice but it helps to ensure the top of the flag is always secured well and you don't 'miss' the flag. With a bit of practice you can do this easily. Keep going until you run out of flags!
Bunting is so cute in kids bedrooms but a long length is also great for parties. I used this for a party and had it draped between trees and it looked great.
Some bunting I have seen has the flags sown together right sides together and turned the right sides out to hide raw edges. I know some people might not like raw edges but it has to be light and flappy and I think this way they really look like flags. The right fabrics will fray so little anyway, but it is all down to personal taste.
I also have some inspirational pins on my sewpaintit pinterest board of how to use bunting
here!

visiting from sew darn crafty. I have to make some bunting. have been meaning to do so for over a year now. Great tip making the flag slightly longer than it is wide, I will remember that.
ReplyDeleteSo cute! Great tips too.
ReplyDeleteSew cute! I am seeing so much bunting all over. I love it. Thanks for sharing a how to. Visiting from Give me the Goods. Have a lovely week!
ReplyDeleteYour bunting looks great!
ReplyDeleteThanks so much for sharing at ASWC Together!
http://www.andsewwecraft.com/2013/04/and-sew-we-craft-together-linky-party-37/
Amy x
Great tutorial! The bunting is adorable! So happy you linked up to Give Me The Goods Monday! Can't wait to see what goods you bring next week!
ReplyDeleteJenna @ Rain on a Tin Roof
Super cute bundting... Thanks so much for sharing at Super Saturday Show & Tell… I’m SO glad you came to (link) party with me! http://www.whatscookingwithruthie.com Come back again tomorrow to share! xoxo~ Ruthie
ReplyDeleteHello Lovely, what a lovely blog. I'm your newest follower from Blog Hop. Followed you via Twitter, Pinterest,Facebook & Bloglovin'.
ReplyDeleteFeel free to visit, follow and leave me comments @www.revampspunkyrena.com
xoxo
Rena