Friday, 26 April 2013
Girls Bedroom with Quilted Letter
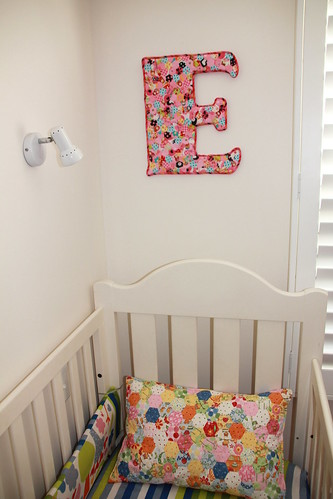
This is my little girls bedroom. I made the cot bumper and sheet using ikea fabrics. I made that sheet and bumper at least 4 years ago and they have lasted really well but I decided it wasn't worth doing things like sheets, so I only ever did one.
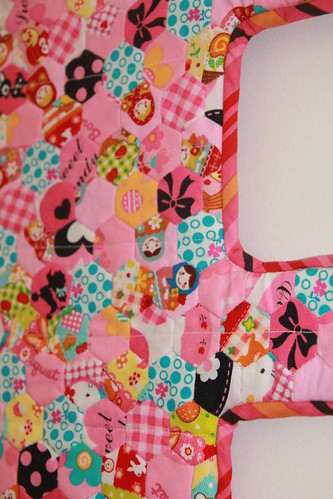
The hardest thing about making the quilted letter was definitely the binding. That was really tricky and I did have to unpick sections of it to get it right.
Overall I am really pleased with the result but it took a long time and was complicated to put together at the end. With hexagons you have to enjoy the process of making them as they do take ages. It is not all about the finished product with them.
Oh look, the bunting has crept in there. You must think I have it in every room in the house!
I like her room. I think we all do our kids rooms a bit for ourselves, don't you? We make them how we wish ours had been.
Labels:
bedroom,
bunting,
cot bumper,
cot sheet,
girls bedroom,
quilting,
wall letter
Subscribe to:
Post Comments (Atom)


I am getting my hexi groove on, also! Love your creative use of those beauties.
ReplyDeleteI'm so glad you showed the close-ups so I could see the hexies better. Lovely project!
ReplyDeleteThe binding went on so well! Really cute letter!
ReplyDeleteWow! I love the E! Such a great finish. The room looks very cute. And I agree....we decorate their rooms a little bit for us. But why not?!?
ReplyDeleteThanks for linking up to finish it up Friday!
Thanks so much Amandajean! linking to finish it up Friday has made such a difference to the numbers of people who see my blog each week. I have been reading your blog for a few years but only recently started my own after being inspired by yours and many other great blogs. Thanks!
DeleteI love it! Looks awesome, well done! I do agree we decorate for us, we're in the room a lot and it is nice to be able to personalise the decorations and put our love for crafting into something for our family members!
ReplyDeleteThanks, and yes, you are right - we do it out of love for them too :)
DeleteSo cute.... and with hexies.
ReplyDeleteHi! New follower via Social Sunday. Nice blog! :)
ReplyDeleteI love how you say you'll post a tutorial once you figure out how to do some of the harder letters. I really want to know what's more complicated than an E with all of those turns and the cute little end bits on each of the E's arms. It turned out really nice and looks so lovely with the rest of the items you made for your daughter's nursery.
ReplyDeleteHe hee, I was thinking that anything with a hole woudl be harder. Not just because I used a stiff piece of wood in there but binding in a hole would be really hard!
DeleteWhat a lucky girl your daughter is. You are so talented - it looks amazing.
ReplyDeleteVery sweet!
ReplyDeleteIt's gorgeous! Does look very tricky though. Stopping by from Lynne's blog :o)
ReplyDeleteWhat a fantastic use for hexagons! I love it!!
ReplyDeleteAbsolutely worth the time and worry! Very cute project and ingenuous use of hexies. Here's to May.
ReplyDeletewow! this is some beautiful wall art!
ReplyDeleteGo hexie!
ReplyDeleteEsther
ipatchandquilt dot wordpress dot com
Everything looks great together.
ReplyDeletethis is a really cute idea!
ReplyDeletethat is so cool! Love the other hexie projects I see in the photo too.
ReplyDeleteLook at that - not one but three Hexie projects! I love them!! Will have to read your archives to see that great quilt, and the pillow. I really like how the room turned out. And thanks for linking up to It's Hexie Friday! Such eye candy we are seeing and lots of inspiration.
ReplyDeleteThis is "E"very so cute!
ReplyDeleteSimply beautiful.It`s the first time I see one E hexie,you are very creative.Thanks for detailed photo!
ReplyDeleteFrom one hexie lover to another, you did great! I enjoy the process too and always have some on the go. Lovely room
ReplyDelete