Tuesday, 4 June 2013
Tutorial - How to make a 16 patch
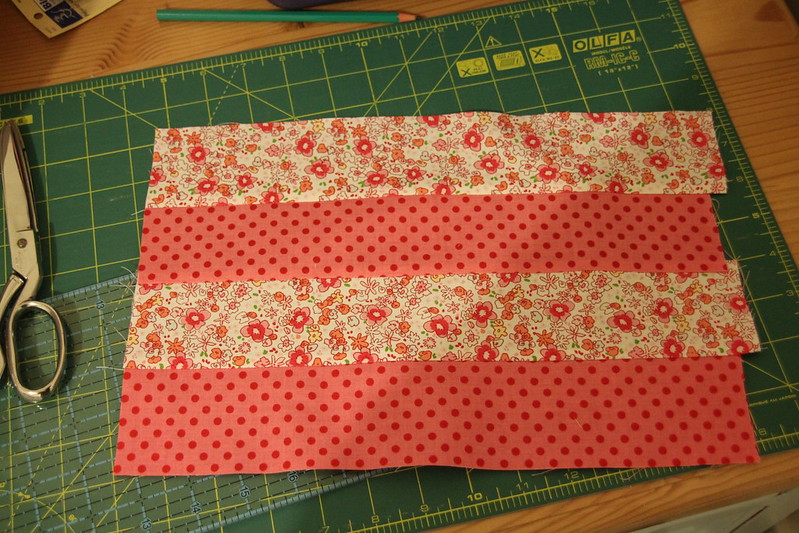
To make these 16 patch blocks I started off with 2.5" strips. I cut mine with a rotary cutter on a cutting mat but you can use a jelly roll which is much easier. They need to be very accurately cut. The strips were at least 10.5" long. I sewed them together as shown with 0.25" seams.
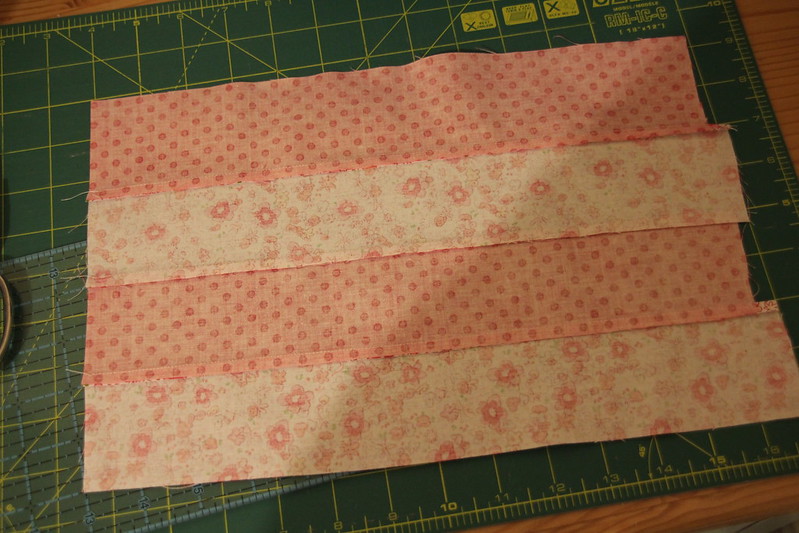
I then ironed all the seams to one side as shown here.
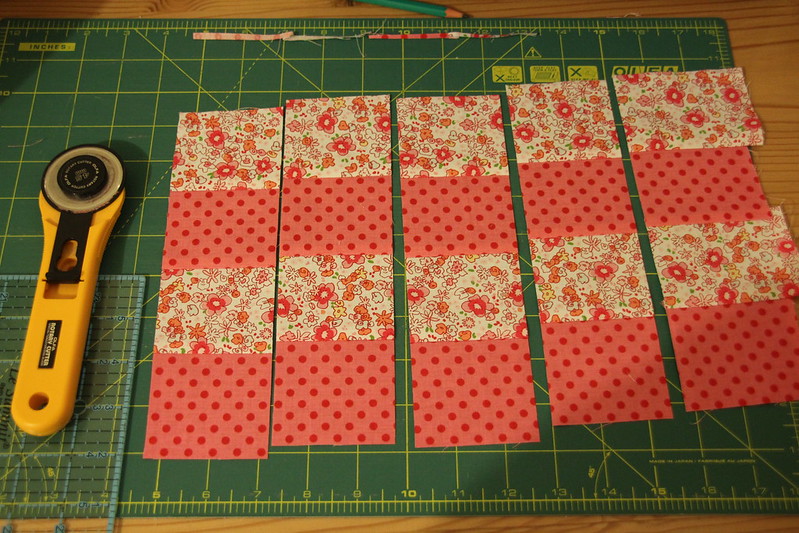
I then turned it to the right side and trimmed off one end so they are all exactly level, and then cut 4 strips each 2.5" wide. You probably have a spare bit left over. Put that to one side to use for... something.
Then turn two of the strips up around.
When you turn them over you can see that where you ironed the seams down they now go alternate sides. This means that you can nest them together to get your corners exactly right and perfect.
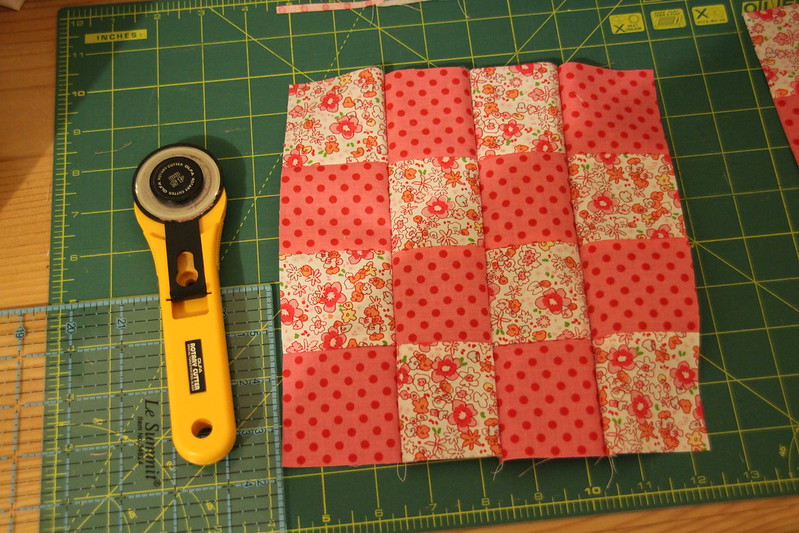
Then sew them together using a 0.25" seam.
Then on the wrong side, iron all the seams to one side and turn over and iron on the right side.
Ta Daaa! You now have a lovely 16 patch block with all the seams lined up beautifully! Well done, you are amazing.
Labels:
16 patch,
corners,
iron seams,
strips,
tutorial
Subscribe to:
Post Comments (Atom)


You are super amazing! I have quilt-phobia. That's totally a word. I might get over it when the kidlets are a bit older, but for now I just drool over quilting blogs...
ReplyDeleteThank you so much! That is lovely!
DeleteYou make it look so easy!
ReplyDeletexx
Thanks, the sewing is. The cutting it the right size is actually the hard bit.
DeleteGREAT tute! I'm very new to quilting, but I'm loving it! These kinds of tues make such a huge difference when you rely on the internet to teach yourself :)
ReplyDeleteI have a question though... if you add a border to your quilt top - do you sqaure your top before adding the border or after?
MC x
#teamIBOT
Thank you! Do you mean square your whole quilt top or square the blocks? You need to square all the blocks before you add borders. If you square borders it will be more obvious as they will get thicker and thinner. Attention to detail all the way along pays off, I am afraid :) I hope that helps.
ReplyDeletebetter answer - I have never squared one up! but maybe this will help http://crazymomquilts.blogspot.com.au/2013/06/squaring-up-quilt-non-traditional.html
DeleteOh very cool. This has made me want to do some more quilting!
ReplyDeleteDo some Jess! Wanna see it on your blog :)
DeleteGreat to make a photo series to Show this :)
ReplyDeleteThank you Nilya. I actually used to do this quite a bit before I even had a blog. I think I knew in my subconscious that one day I would have a blog.
Deletevery nice....that is a great block to start out with and it works up quickly.
ReplyDeleteThanks, it is really quick and so satisfying to get them lined up. Or mostly lined up :)
DeleteBeautiful fabrics to pick from! Wonderful post.
ReplyDeleteThanks so much for your kind words! xxxx
Deletethey look great and that is a nice quick way to make them!
ReplyDeleteI am stopping by from the WIP hop, hop on by if you can! http://domesticdeficitdisorder.blogspot.com/2013/06/wip-wednesday-june-4th-edition.html
Thanks Tanyia, I visited your blog and commented. Thanks so much for visiting me!
Deletegreat tutorial!
ReplyDeleteLooking good! that quilt will go together fast!
ReplyDeleteThanks Jjthor, it woudl but I will use them as a border. I think I will make another one and make the whole quilt from these blocks though. But not this week.
DeleteThese are so pretty.
ReplyDeleteGreat tutorial! Love the fabrics! Thanks for linking up to Give Me the Goods Monday! Love having you party with us!! Jenna @ Rain on a Tin Roof
ReplyDeleteThanks Jenna, I love your link party!
Delete