How to make Loose Sofa Covers
18 months ago we moved into our newly renovated house and had a lot more space. We had spent all of our money on the renovation so we were not in the market for buying furniture. Some people set aside money for doing that but we just don't do that. So I kept my eye our on freecycle for furniture. We had only been back in the house for 6 weeks when an advert came up for two two seater sofas, and they were only about 2 miles away. I asked for them immediately. It wasn't that surprising that I was given them because the advert said they were good quality sofas but a bit grubby so needed either throws or ideally loose covers. Not many people are actually looking for sofas like that, particularly two of them. I sent my husband for them and he made two journeys and used the roof rack.
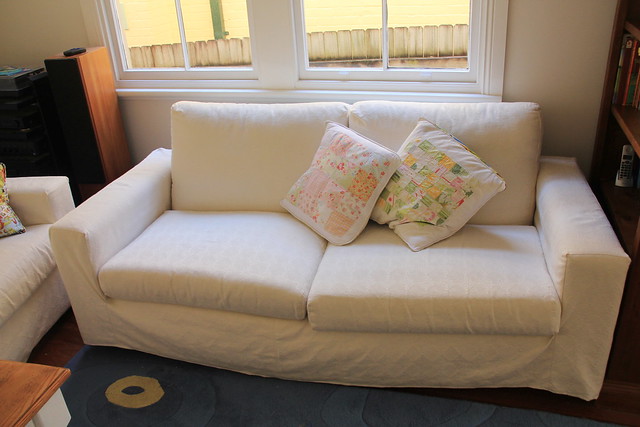
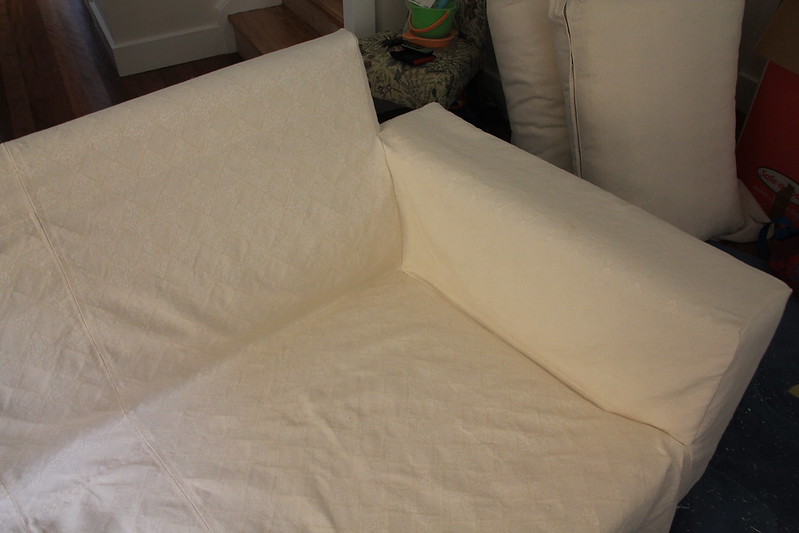
This is one of them finished!
I was so happy when I saw them that they are really square and so very easy to cover. I started with the cushions so we could actually sit on them. I reused the old zips. I went to my favourite local upholstery fabric shop and got the end of a roll for only $7 per metre to do the first sofa. I think it needed about 7 metres. Once I started I realised I wanted to do both in this fabric so I went back and bought enough for the other one. I had known they had another whole roll of that fabric when I bought the first piece. Total cost of fabric was $130. The fabric I got is cotton and polyester so it won't shrink and will be easy to wash and dry.
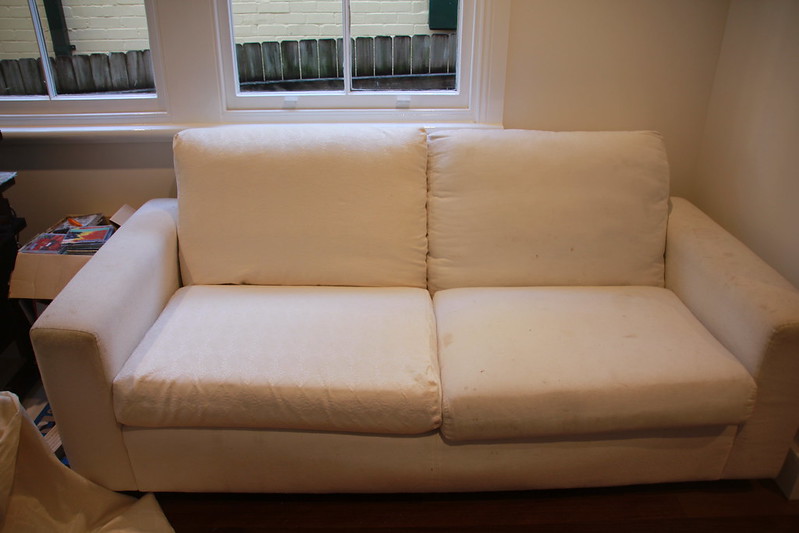
Here is one before - it was quite grubby. I thought it was not a very good idea to buy a white sofa without loose washable covers.
The old cushions were fixed in place with zips. I decided not to do this.
With the cushions done it was already so much better and we could sit on them. I just made them by using one large piece the width of the cushion which went all the way around. Then I cut side pieces and sewed them into a bag. I made the the cushion fitted in nicely and added the zip at the end.
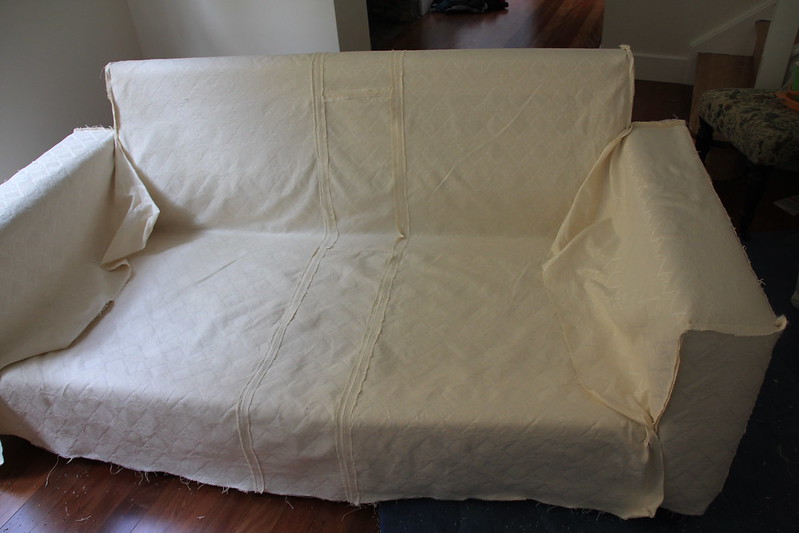
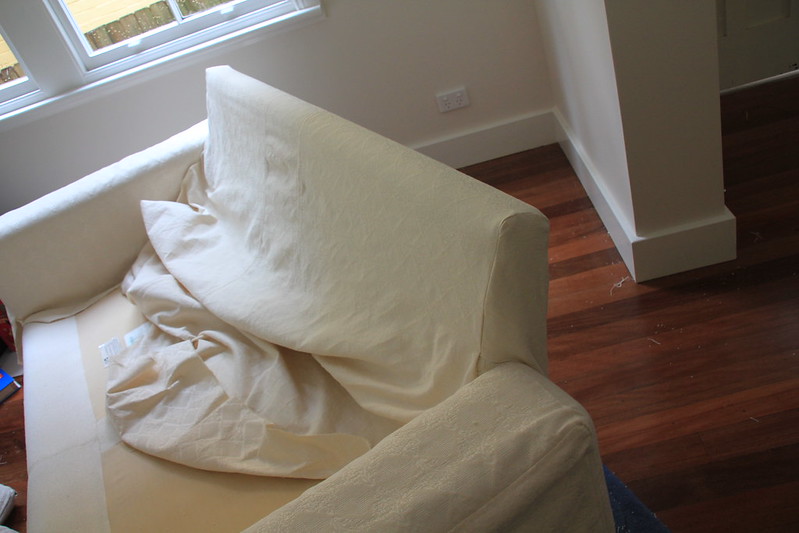
Here is the cover inside out and still in pieces. I started by making the arms. I measured the height, depth and width required and cut out fabric with a generous seam allowance. So I cut side, front, top, back, and inner side pieces. I sewed them together and checked they fitted nicely. For the main part of the sofa I made a very large piece which needed a seam down the middle so I chose to do two seams as shown. To get it to fit I placed it on the sofa wrong side up as shown and cut the top/side pieces and tacked them on in situ. Then I removed it and machine sewed them.
When I was putting the top/side piece it had to go all the way down the back to make it fit.
Then I turned it over and basically felt good that it fitted and I was going to have a 'new' sofa. As you can just about see I sewed down each side of some of the seams on the front because I liked the look of it and I think it will be more robust if washed a lot and stop it from fraying.
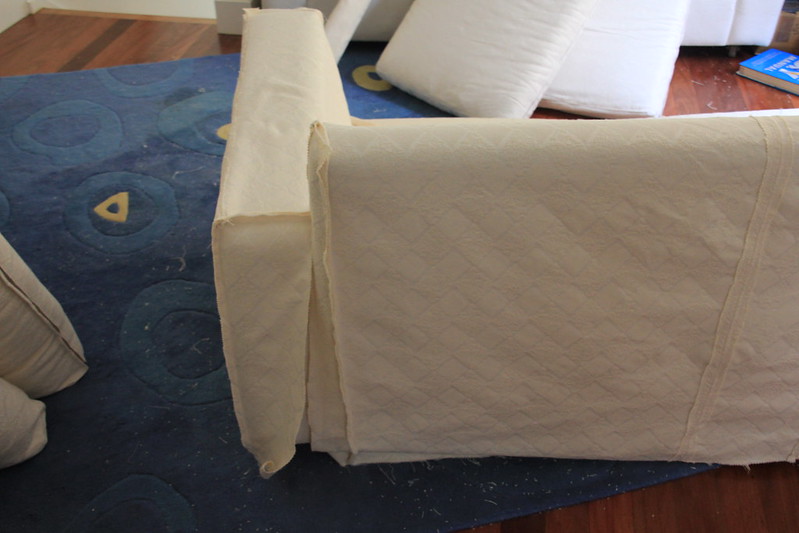
Sewing the arms onto the main part was the hardest part and I tried to avoid puckering. I mostly managed it. Again putting the parts on the sofa inside out and tacking them together is one way to do it. These areas are covered by the cushions anyway and I guess this is why, a year later, only one of the two sofas is actually joined together into one piece here.
Finally I just hemmed it all the way around. I thought about getting velcro and sticking it to the underside of the sofa and I think this would have been better but I didn't do it. I think a lot of professional loose covers do this (e.g. ikea) and it does look great. I will do this next time.
I was honestly surprised at how quickly and easily these came together. I expect they took about 20 hours for both sofas. And I am so happy with the result. The cost was $2 petrol to collect them (very approximately), $130 fabric and $5 thread. Total = $137.
If you have a sewing machine, you could do this too. The hard part is finding the sofas in the first place which are a good shape to cover.


You sure did a great job! I love a white sofa but I would want washable covers for sure! Thanks for sharing this with Diann and I at TTF!
ReplyDeleteLinda
Thanks so much Linda! Yes I agree, although they do seem to sell a lot of white sofas.
DeleteWow! What a great project! I love those white sofas and someday I will have one...with slipcovers!
ReplyDeleteThanks for sharing at the party!
Stacey
Thanks Stacey - I think we all dream of white sofas!
DeleteThank you so much for sharing with Wednesday's Adorned From Above Blog Hop. We hope to see you at this weeks party starting at 8:00PM tonight.
ReplyDeleteDebi and Charly
http://www.adornedfromabove.com
I love this! You did an amazing job with your slipcovers. I have always thought I should like to make slipcovers but it scars me to death. I have an Ikea sofa, chair and 2 ottomans that I love. Fortunately I have both white and pink slips for them! I love you tutorial and your sofas turned out beautiful. You should be most proud of them. Hugs, Beverly Tea Cottage Pretties
ReplyDeleteGood on you to get two sets of slip covers! I don't think I would do this. I think I would probably decide to go back later and get another set and then they would have discontinued it. They did this to my nikkala sofa which I love. But I found a great company in Denmark that make the covers so I managed to get some there. I love them!
DeleteYou have some awesome skills! I tried this way back in the day using Franks tips from Trading spaces...they did NOT turn out as nicely as yours did! Thanks for sharing these at www.frugalfitfamily.com - My couches need a recover now...BADLY. We were talked into suede and with kids...BAD MOVE! I am going to have to head to the fabric store and break out the machine!
ReplyDeleteI have never had anything suede. Except shoes and they get marked! Good luck!
Deleteits very nice blog! split ac cover online
ReplyDeleteits very nice blog! Sofa Cover
ReplyDeleteits very nice blog! Mattress Protector
ReplyDeleteThis comment has been removed by the author.
ReplyDeleteThis comment has been removed by the author.
ReplyDeleteThis comment has been removed by the author.
ReplyDeleteThis is a fantastic guide for making loose sofa covers! The step-by-step instructions are clear and easy to follow, making it a great project for anyone looking to refresh their furniture on a budget.
ReplyDeleteFor those who might be short on time or prefer a ready-made option, I highly recommend checking out The Cover Company UK. They offer a wide range of high-quality, custom-made custom-made sofa covers
that are both stylish and durable. Their selection ensures you'll find the perfect fit and design to match your home decor.
This is a fantastic guide for making loose sofa covers! The step-by-step instructions are clear and easy to follow, making it a great project for anyone looking to refresh their furniture on a budget.
ReplyDeleteFor those who may be short on time or prefer a ready-made option, choosing well-made sofa covers can be a practical alternative. They help protect furniture while keeping the look neat and coordinated