Saturday 31 August 2013

Wine Rack from Tubes

I got a new set of shelves recently for my under stairs cupboard.  It has revolutionized the space!  Before everything was on the floor and I couldn't get to anything easily.  This included the vacuum cleaner, so every cloud has a silver lining.
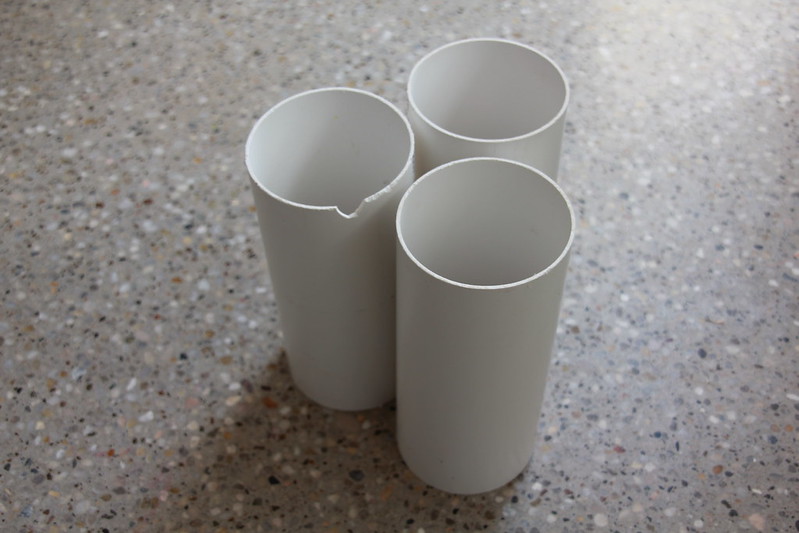
The shelves are 4 squares which are all 300mm high, 360mm wide and 290mm deep.  A wine bottle is too tall to stand up in that and most folders/files are also too tall so I decided I wanted to get wine racks to fit into the spaces.  After minimal research I discovered that even a 3 by 3 wine rack would not fit in there and these were about $20 each anyway in Australia.  It didn't seem like I could cut these down and to only fit 6 wine bottles in was not a good use of the space.  Then like a bolt of lightening it came to me!  Plastic Tubes!
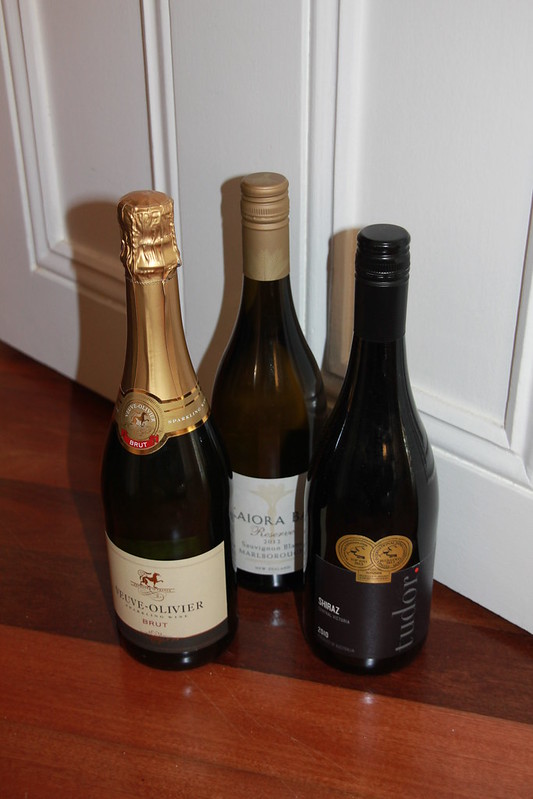
I bought a couple of 1 metre lengths of this drain pipe or soil pipe or whatever it is from bunnings. The 3m lengths were much more economical but they had run out of these of course. My husband cut them up into 200mm lengths using a saw.  I then sanded the cut ends using a 60 grit sand paper or whatever you have to hand.  Ta da!  One has a chunk out of it from the sawing.  This can simply go at the back.  It will never be seen!
Then you need wine.
Gather together as many bottles as you can.  Enough for all the space or tubes you have cut at least.  Open one and pour yourself a glass.  If you have been doing any cutting or sanding then you will probably need one.  If you have children you will probably need one.  Be careful not to drive or operate heavy machinery after drinking.  Also, it is probably best if you have already finished the sawing and put all of the tools and stuff away.
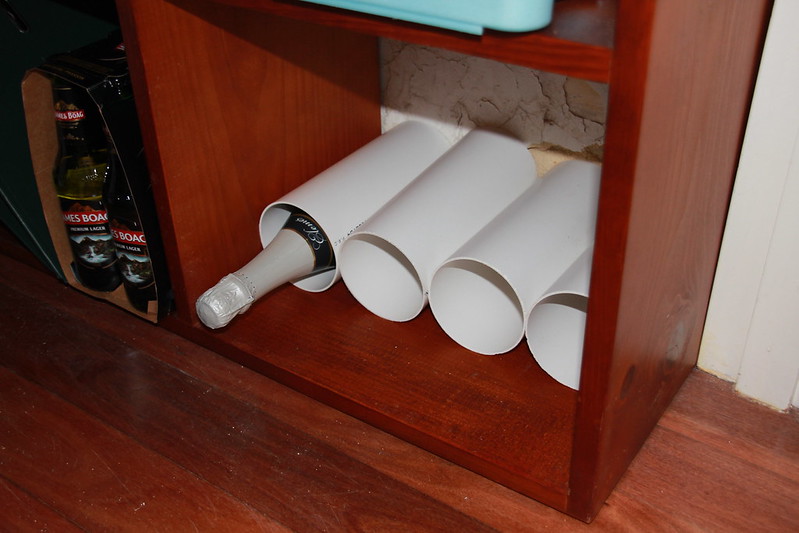
Then after a glass or whatever, you can put the tubes and remaining wine bottles into position.
Four fitted perfectly in the horizontal space on my shelf.
I had 10 tubes and I have room for 11 tubes in the space.  I can still put a wine bottle in that place though.  If I had room I could just put another layer of wine bottles on top but they don't fit.  So at some point we are going to go to Bunnings and buy a 3m length of this pipe and cut more tubes.  I want more wine in the other bottom shelf.   This is easy, cheap and will fit into small spaces which might otherwise be a bit useless.
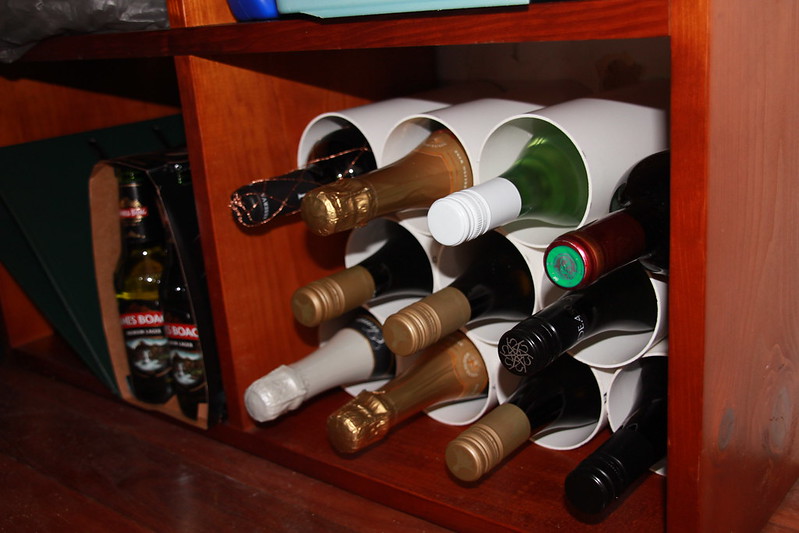
I think I might need to buy some  more wine now.

Friday 23 August 2013

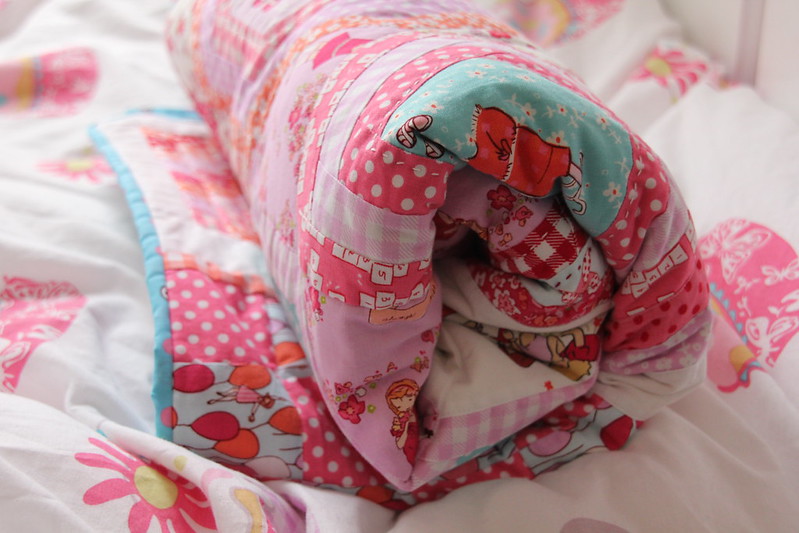
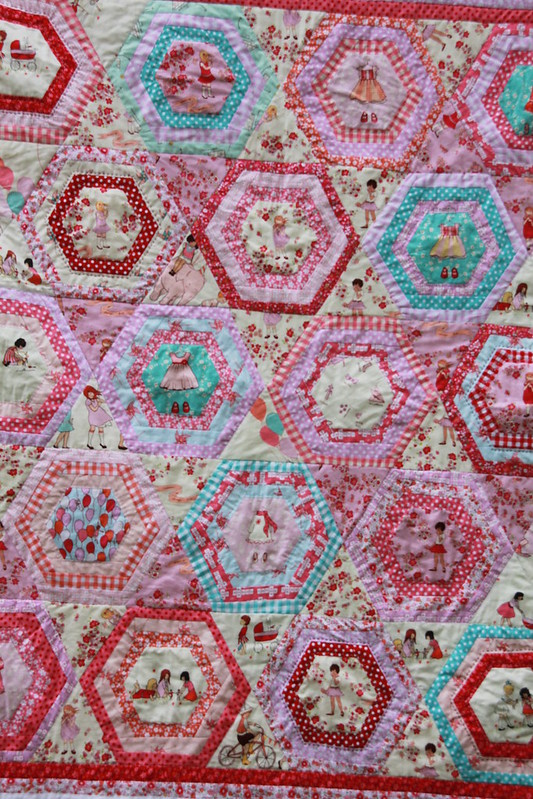
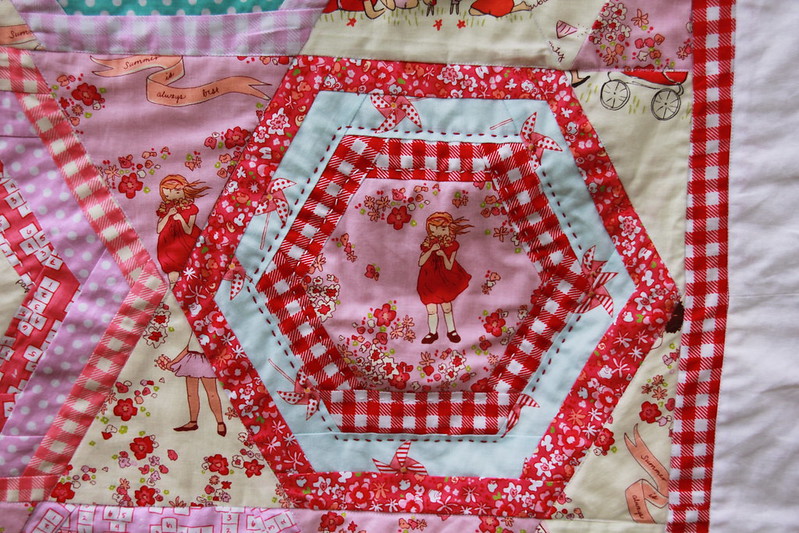
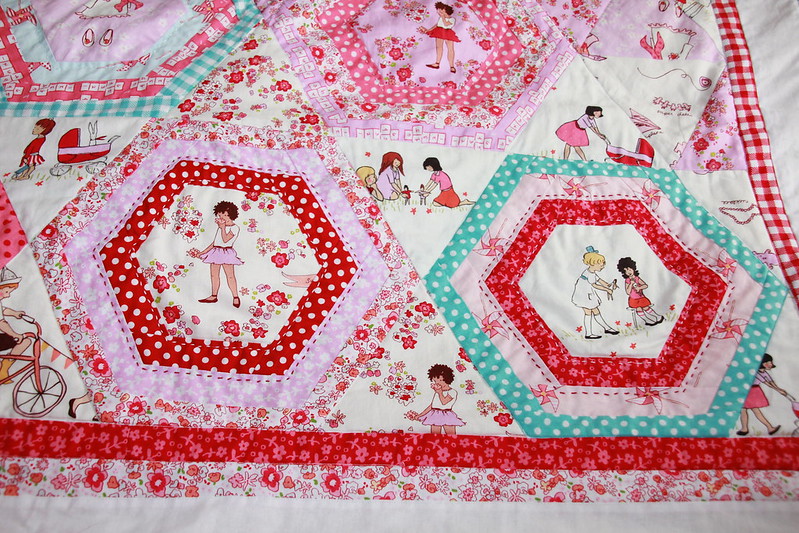
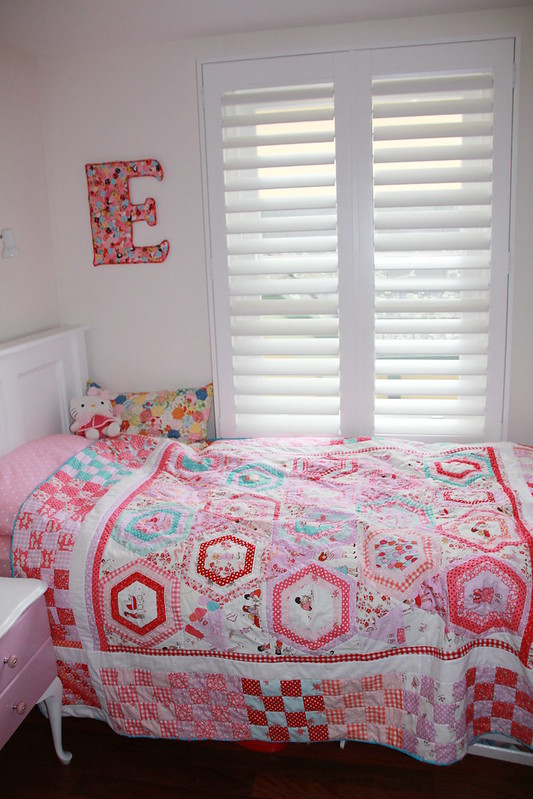
Finished! Hexagon Log Cabin Quilt!

I finished it!  I had a tiny bit to do for about the last month and I just procrastinated and didn't do it and then suddenly, it was finished!
I machine quilted it and then added some hand quilting to the hexagons to show them off.


I hand quilted in red around the second border only if there was a red fabric in the border.  I think these ones look the best.
The back is made up of the larger panel that came with the children at play fabric by Sarah Jane, some squares of the fabric and also some white fabric with writing from ikea.  The ikea fabric is quite thin which makes it harder to get flat.  I love the design though and I think ti offsets the girlishness of the children at play fabric well.
The squares are 3.5" finished so started off at 4".

The binding is bright turquoise with pink polka dots and little panda heads which is so cute. I found it at spotlight.  I cut it into 2.25" strip which gives a nice narrow binding which I like.
And here it is on my daughters bed with the bedside table I painted, the bed I painted and the patchwork E and patchwork pillow!  I wish my bedroom had been so sweet when I was little.

Wednesday 21 August 2013
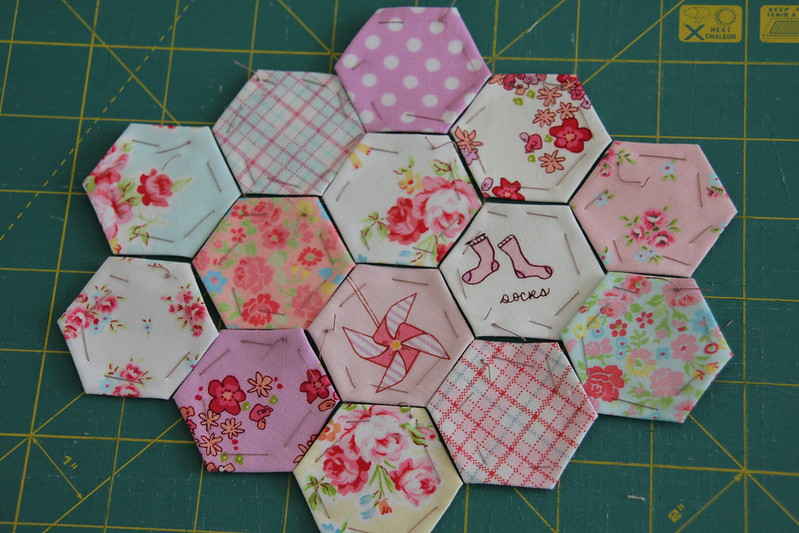
New Hexagon WIP

I love to make hexagons.  I have started something new today and it is my favourite kind of sewing.
I am going to make a small cushion cover and it will be patchwork, so a random pattern of hexagons.  It will mostly be pink! I want to use all the pinks I have bought lately and make it really cute and girly.
To make hexagon patchwork you start with paper templates.
I printed some sheets from the internet and I am making 1" hexagons which means each side is 1".  This is my new favourite size of hexagon.  You cut lots and lots of hexagons out of paper. 
In the picture above I have started to make a hexagon.  I have cut fabric shapes which are roughly hexagon but larger than the paper hexagons.   Then I tack the fabric onto the paper hexagon.  This is English paper piecing (EPP).
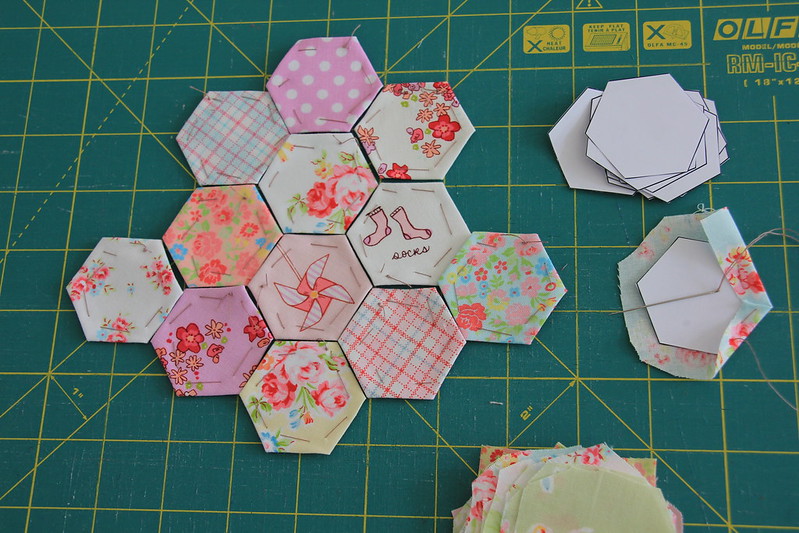
I am going to make a lot more hexagons before I start to sew them together.  So far the fabrics are from lecien antique flower and Sarah Jane children at play and one hex of Tanya Whelan hatbox.
I have a teeny tiny little bit of sewing to do on my hexagon log cabins quilt and I really need to get that finished and photographed.  Maybe this week!


Friday 16 August 2013

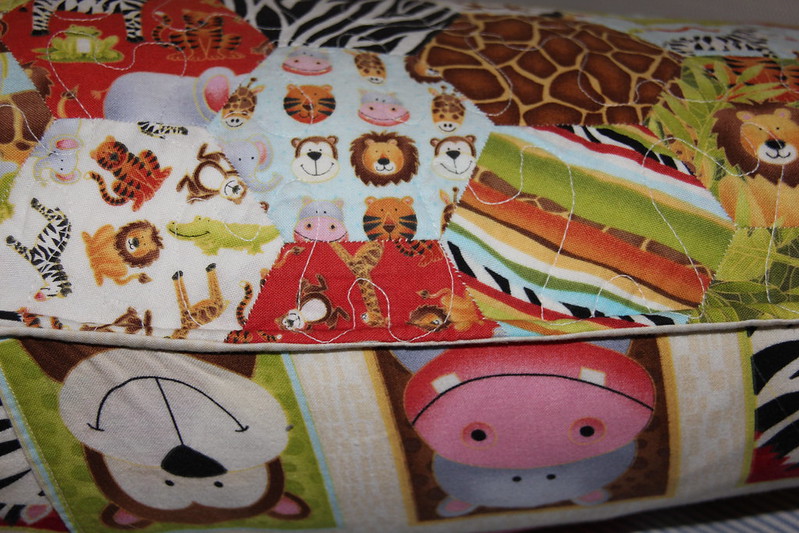
Jolly Jungle Hexagon Pillow

I made a hexagon pillow using jolly jungle fabric.
 I made it for my son who used to absolutely love all wild animals and especially elephants.  He loves this pillow and uses it all the time when he is making dens.  I got a fat quarter pack of these fabrics and the hexagons are 40mm on each side which is just over 1.5".  I have a lot of these fabrics left including a couple of panels.  I don't love the fabric and I guess that is why I haven't used the rest of it yet.
 The back is most of a panel which came with the fat quarter bundle.  It is quite thin and not really right for this type of pillow back.  I never have great success with this type of closure.  I really should use zips.
 The hexagon patchwork is made using a method called English paper piecing (EPP) where you use paper templates for each hexagon.  I tack the fabric onto the hexagon, but some people use adhesive.
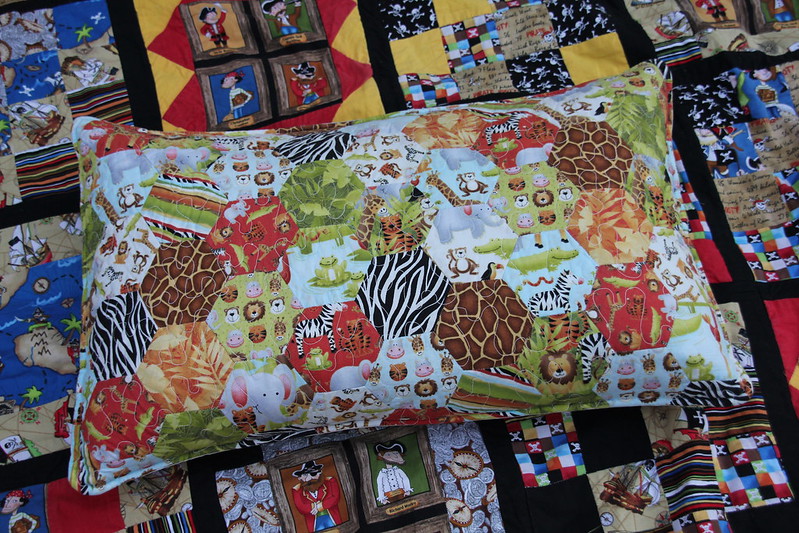
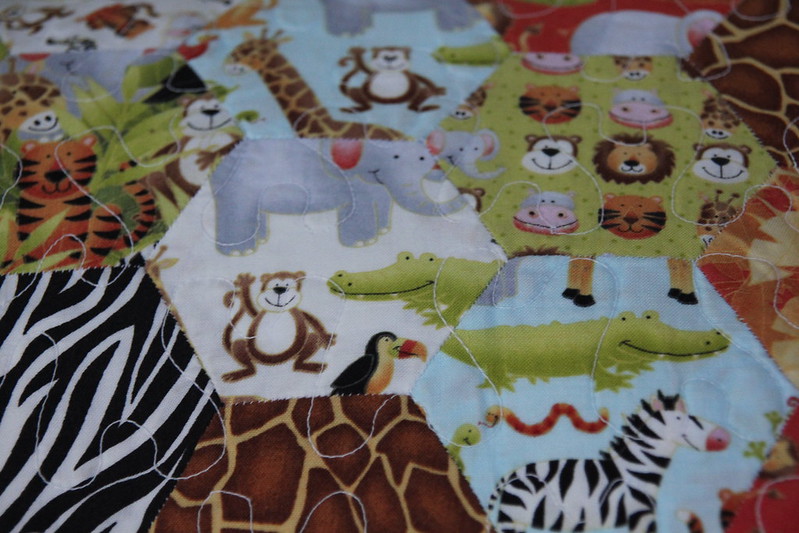
Then they are all hand sewn together.  I love to do this and I just enjoy the process.
I then machine quilted it and this was one of my first attempts at stippling.  It is not stippling, it is more like some sort of dog bone (!).  I still need to master this.  I need to have another go on a small project like a cushion cover or mini quilt.  To do this you need a darning foot.  With a darning foot you can sew in any direction and draw things, write your name - be creative!
Here is my darning foot. I bought it on ebay.
I love hand piecing.  I feel you have so much more control over joining up corners accurately.  However, it takes a long time and I enjoy machine piecing too because you can make such big things quickly.  I just really want to improve my machine piecing skills.
On this jungle pillow I didn't bind the edge.  I did my usual trick of  doing essentially a french seam.  I sewed the front to the back with the right sides together.  Then I turned it right side out and sewed around the edge about 0.25" in from the edge and you have what looks a little like piping.
Make some hexagons this weekend!  I think I will.

Thursday 15 August 2013

Wingback Chair and Spring is Coming!

We can't really complain about the weather in Sydney.  It is winter and yet we hardly ever really need coats and get a lot of blue sky days.  But summer means swimming in the sea and warm days everyday so we do look forward to it.  I took this picture this morning and I think spring is on its way.
Since my sister left we have mostly been ill.  I have just had no energy!  I have been working on my second wing back chair though.
This is it before.
It has taken me a long time to get all the upholstery off.  My hands were really sore from all the pressure on my palm from twisting the screw driver under all the staples.  There are hundreds of staples and it takes longer to get them all out than to put the new covers on.  I just used a screw driver and a pair if pliers.  Those were all the tools I needed.
The first piece to come off was the skirt and then the back, which is held on with this metal strip.  I will reuse all of that.  Under the back was a thin layer of foam which I will reuse.
This is the back of the chair upside down.
Then the sides come off and then the outside of the wings.
Then it is the inside of the wing.
 Then the seat back.
Finally the arms and front of the underseat were left.  The arms are the hardest bit to put back on.  Last time I took ages removing them to try to remember how to get them back on.
It had some old fabric underneath which was similar to the top fabric but not the same.  So it had already been reupholstered once.  I removed every single staple that was not needed.  I just don't like to think of any old staples or fabric underneath - this must be the perfectionist in me!
Here it is completely stripped.  I am leaving the white underseat fabric as it is really thick and there is nothing wrong with it.  I just have to sew the new piece onto it by hand as I can't get it to the machine.  I feel this is easier than removing it.  So that is what I have spent some time doing lately!
I also made a new cushion cover for the seat.  For the  other one I never got round to making either the seat cover or the arm covers and I regret this.  I am definitely going to make the arm covers this time to keep the chair clean.
Here is the piping for the cushion cover.  I bought the cord for this.  For the piping for the chair I used the old cord which was plastic, and recovered it.  I bought some new cord because I never had arm covers so had no piping to reuse.
I used the old cushion as a sort of template to get it the right size.
Here is the new cushion.  It is too loose for the cushion and so next time I will take apart the cushion cover and use that as the template.  It isn't too bad but could be a better fit.  This cushion cover was actually the hardest part about doing the entire chair which surprised me.  The piping was hard to sew around. 
Sadly I have had to use different fabric for the second chair.  The first one has gone bobbly in places and I really didn't want to do another chair in it.  I think this is what put me off doing arm covers or seat cover.  My plan is to recover it, but I don't think it will be very soon.  I am not too heart broken as I think I can do a much better job of it next time.
I should be able to recover the chair faster than it took to take off the old covers... well I hope so!

Tuesday 13 August 2013

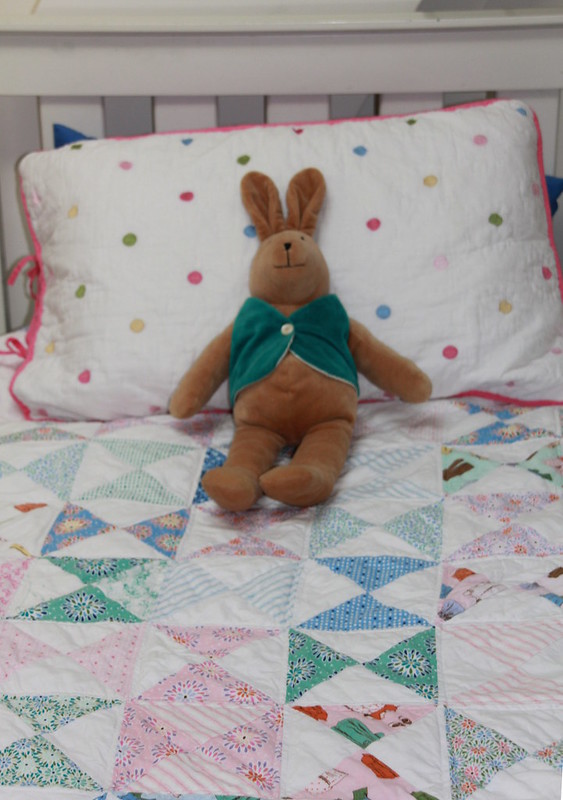
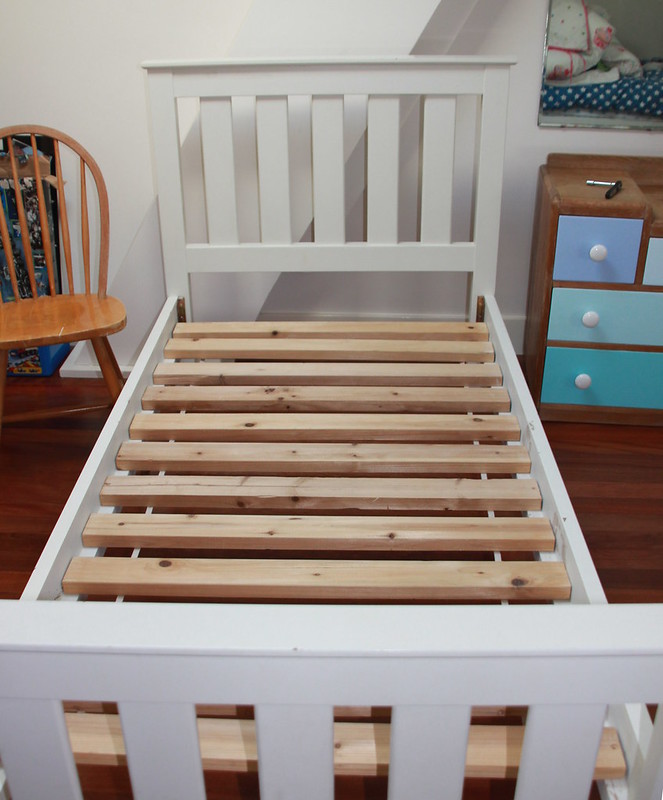
Free Bed from Gumtree

I managed to get a free white bed on Gumtree.  I was looking at single beds and I was thinking I would have to paint one as I wanted it white.  Then I found a free white one.  The advert said it needed work, but as it wasn't far away I decided to grab it.
This is an after pic above.  The nice people giving the bed away showed me and it had a lot of stickers on it.  It was also a bit broken in one area.  It is not made of wood but medium density fibre board or particle board or something.  This means it isn't very strong and where it had  hardware screwed into it it had broken.  The screws could no longer grab onto anything and it was all fibres hanging out.  Daddy P fixed this with builder bog.  Builders bog is a filler but it is two parts which means it is epoxy based and much stronger than usual filler.
Here is a picture of the stickers.
I wasn't worried about getting the stickers off.  I think there are a few ways to get them off but the way I like to do it is with peanut butter.  Just spread it liberally over the stickers and after a few hours the peanut oil will have reached the adhesive and made it completely useless. Most stickers just peel off easily.  Some more stubborn ones may need to be torn or scraped a bit so the oil can reach the adhesive more easily.  If the stickers are nice and old they come off really easily.  I use this method on book covers too as it gets labels off really well.  But I only do it if they won't come off and leave a sticky mess behind.
The peanut butter method was suggested to me by my very good friend Katie who is a woman of many talents.
I left these over night and they were pretty stubborn stickers!
But once they were off and the bed was mended it looked like this:
Not bad for free.
I love it and we used it when we had visitors recently.  It was so nice to give my niece and nephew a nice bed each to sleep in. We had great weather while they were here and they had a lovely time seeing lots of things Sydney has to offer.


Tuesday 6 August 2013

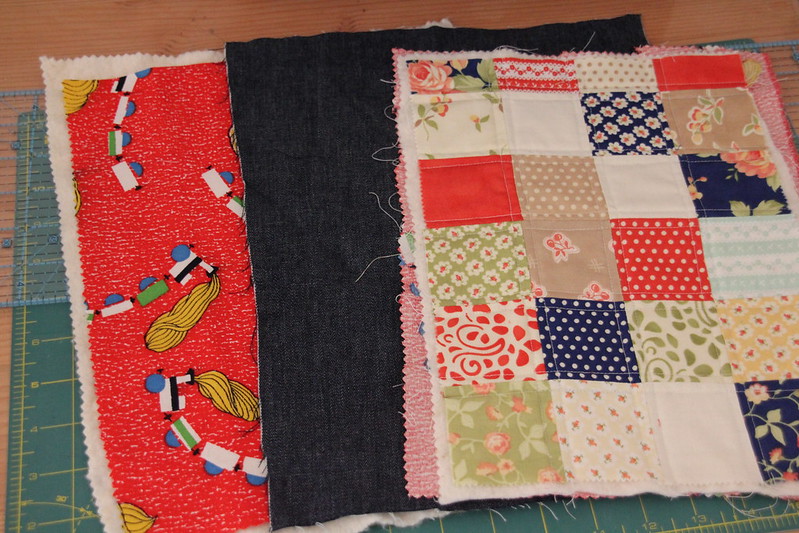
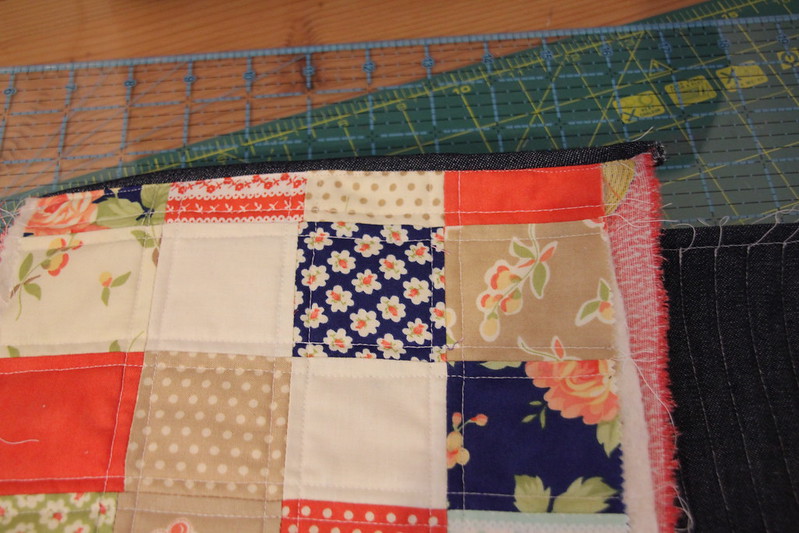
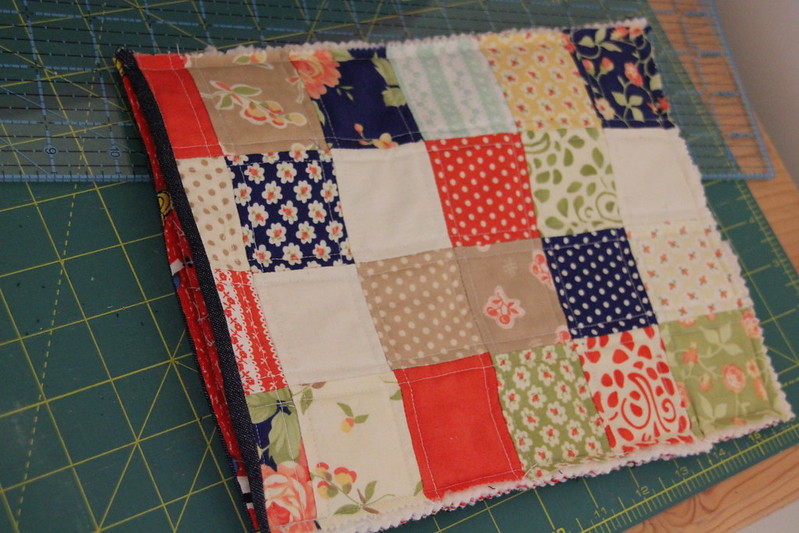
Quilted Patchwork Tablet Case

Remember I started a tablet case as a gift here? Well I finished it!
It is about halfway to the UK at the moment on the way to my dad.  It won't be much of a surprise :)
Last week I made the patchwork front and then yesterday I finished it as my sister was leaving and needed to take it with her.  I hope he likes it.  He didn't want really girly colours...
I had to put binding on the front side opening end but I decided to do the back differently so it didn't need binding.  So I made a sandwich if the lining and back right sides together and the batting next to the lining and sewed along the top.  Then I turned it so it was right sides out and did one line of stitching along the top.  I then did straight line quilting on the rest of the back and the lines were about 0.5" apart.  As it is quite small this was quick.
 I did some thin binding along the front opening end.  I did at all by machine.  This worked ok although it looks all a bit wavy in that shot.  It isn't wavy in real life.
Then I sewed the front and backs together.  I then made my binding. 
Here is the quilted back before binding.  I love the simple quilting.  I also like the denim fabric.  I don't know where it is from as I was given it by a freecycler.  What is that bit of white fluff in that picture?  Oh, just some white fluff.
And here it is with the binding on.  I hand sewed it to the back as it was quite a few layers and I didn't think I would be able to machine it on and have it look very neat on the front.  I also messed up the top right by not having enough binding length to finish off nicely. Oh dear. But it isn't THAT noticable.
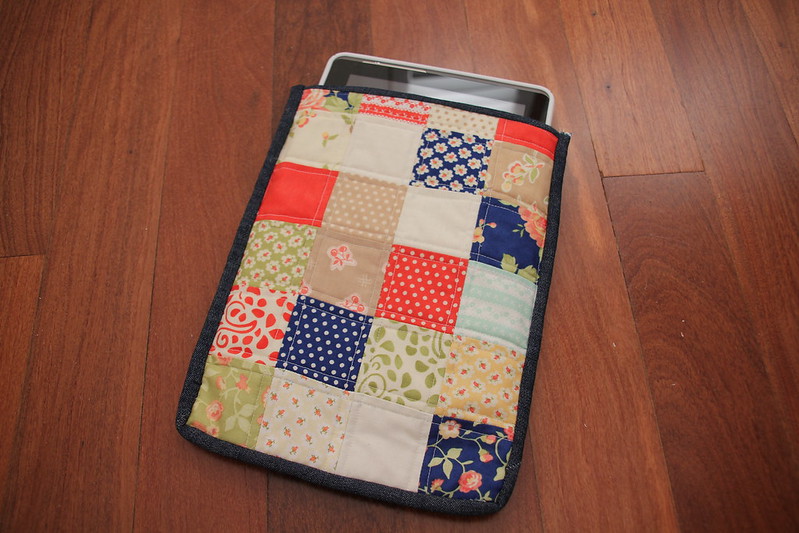
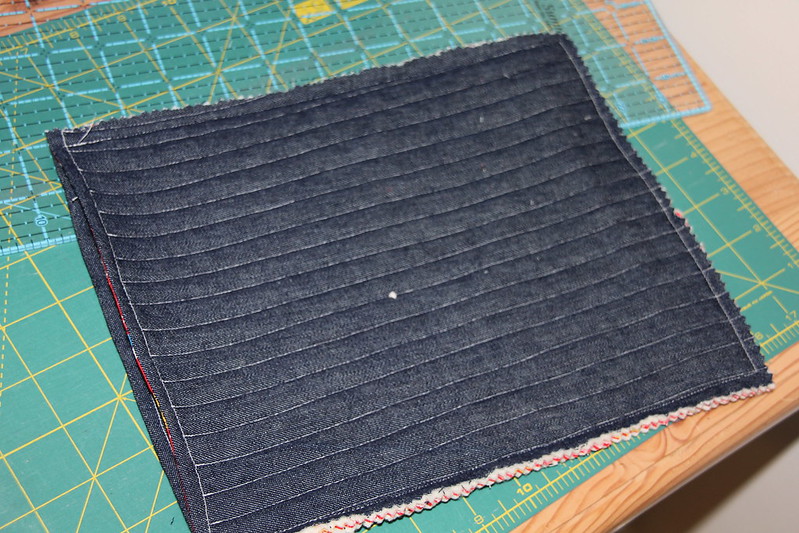
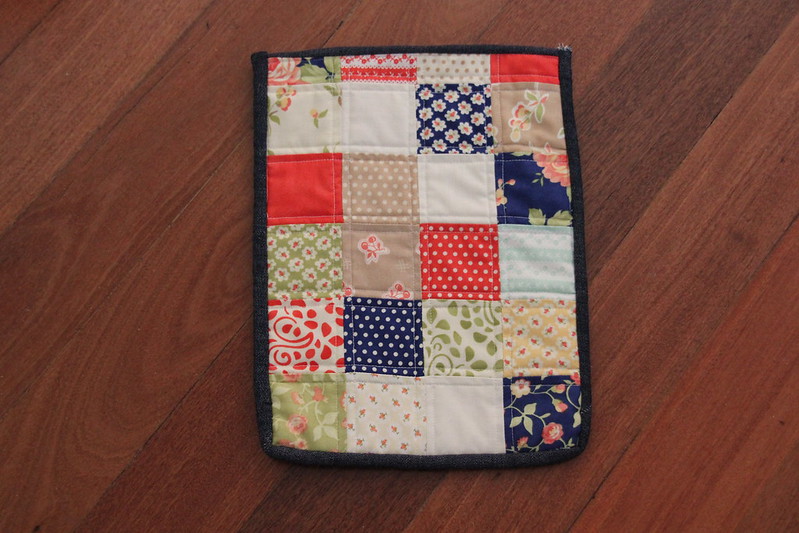
I hope my daddy loves it and it keeps his tablet nice and safe and free from scratches!